Posts: 2,328
Threads: 271
Joined: Jun 2014
Location: La Libertad, Philippines
I'd consider using Loctite at assembly. Just remember you'll probably never ever get it apart again. Epoxy would also be a possibility. At least one can soften it by heating with a hot air gun or low temp oven.
Posts: 691
Threads: 14
Joined: Feb 2015
Location: Oakland, California
The following 1 user Likes Roadracer_Al's post:
Mayhem (04-30-2015)
04-30-2015, 12:02 PM
(This post was last modified: 04-30-2015, 12:07 PM by Roadracer_Al.)
I'd avoid any chemical adhesive. I'd definitely avoid the dremmel as it will remove too much material quickly.
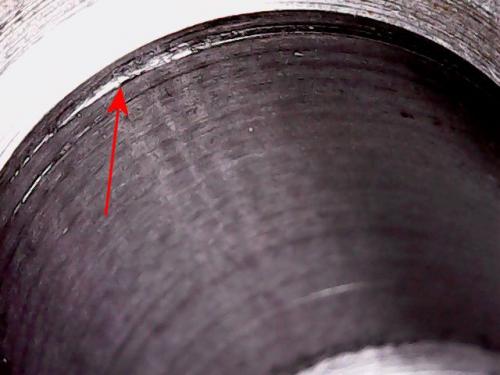
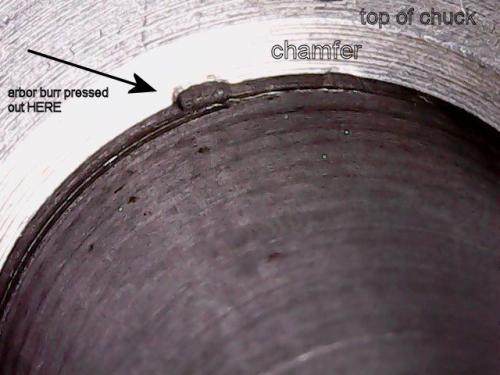
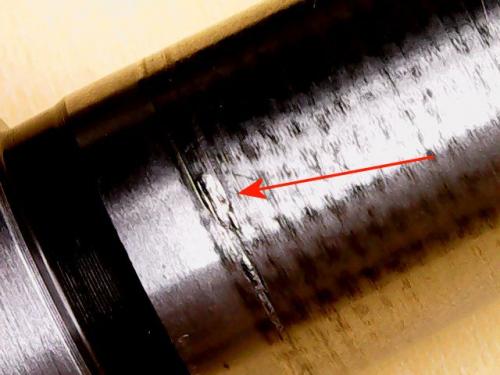
Consider that when they were new, the surfaces were close to the geometric ideal cone. However... there was a little bit of grit that got between the male & female sides of the taper, preventing it's ability to wring together, reducing it's torque capacity, so it spun. That little bit of grit then acted like a plough in a field.
Basically, a dent, ding, burr or other deformation has two components -- a low spot and a high spot, just like a furrow in a field. We can easily remove the high spot so it comes back down close to the geometric ideal cone. We don't need to remove the remaining low spot, it just doesn't matter.
Clean both halves with acetone and a lint-free rag, then use a sharpie -- or prussian blue, if you have it -- to determine the fit. Cover the entire male side of the taper with sharpie and wring the taper together. If, after you separate them, you see shiny spots on the male side, they're high. If you see dark spots where the sharpie has transferred to the female side, they're high. High spots get taken down with a stone.
Tom's right -- use a fine round stone to tidy up the female side of the taper, and a fine flat stone to tidy up the male side. I'd do it by hand and not under power, it's easy to make it out-of-round.
When you are rubbing the high spot with the stone, you will notice that the shiny bit "spreads" as the high spot is removed. It's becoming closer to the ideal cone. Don't remove too much or you'll make a low spot. Low spots do not contribute to carrying torque. You really want to sneak up on the good fit with lots of testing iterations.
Clean both halves with acetone and a lint-free rag and re-apply the sharpie to test again. When it looks mottled uniformly, it's a good fit.
Then, clean both halves with acetone and a lint-free rag again (noticing a theme?) and assemble. Retract the chuck jaws and seat the taper with a single sharp blow with a rubber mallet.


![[Image: TomsTechLogo-Profile.png]](http://tomstechniques.com/wp-content/uploads/2013/11/TomsTechLogo-Profile.png)