01-23-2016, 07:53 PM
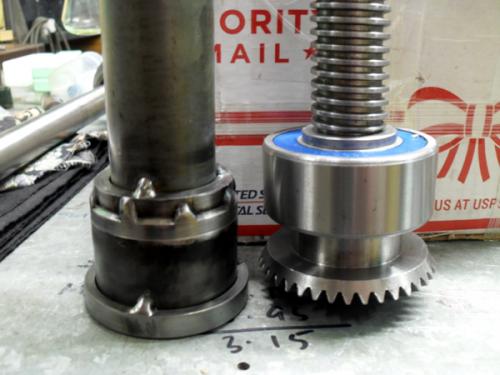
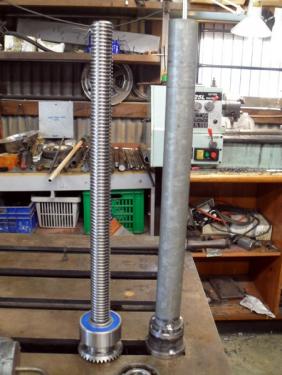
I would remove the screw as a last resort Ed. If your mill is constructed like mine, which I am sure it will be, the bearing is going to want to come out with the screw. If there is a bearing retainer in place, you may be able to carefully tap the elevation screw out. Each blow of the hammer is going to move the inner race down, whilst keeping the outer race stationary. Thus, the force is going to be placed on the balls. If the actual bearing comes out, it can be a pain in the arse to put it back in.
As I was replacing the bearings, I wasn't really worried by hammering on the screw (copper hammer) to drive it out. Additionally, there was no option for me to protect the bearing whilst doing this, as the diameter of the screw is larger than that of the inner race. You should always apply the force to the bearing face when installing/removing (if you are going to reuse them), as this prevents damage to the bearing.
When fitting a new bearing I had to make up a tool to install it into the knee by driving it only on the face of the outer race. Here is the tool - put together out of scrap I had on hand. It doesn't need to be pretty, only functional and with some luck, will never have to be used again!


You are working with new bearings, which is why I suggested tipping the knee so that you could lay it down on its back. I'm pretty sure I used a couple of pallets, so that I could lower the knee down and have the bottom sit on the edge, with enough height in the pallets to ensure that the bottom of the screw was above the ground. I then stood behind the pallets, facing the engine hoist and pulled the engine hoist towards me. Doing this allowed the knee to pivot on the bottom-rear edge and I could then bring it to rest on its rear face. Unfortunately, I don't have any pics of the process I have just outlined but it is quite easy if you think ahead, plan carefully and take your time.
When you come to reinstall the knee to the mill, I would screw the nut back on first (I'd unbolt the pedestal and leave the nut attached). The reason that I say this is because the damage that was done to the nut on my mill was most likely due to someone lifting the knee to high and then trying too lower it again.
As I was replacing the bearings, I wasn't really worried by hammering on the screw (copper hammer) to drive it out. Additionally, there was no option for me to protect the bearing whilst doing this, as the diameter of the screw is larger than that of the inner race. You should always apply the force to the bearing face when installing/removing (if you are going to reuse them), as this prevents damage to the bearing.
When fitting a new bearing I had to make up a tool to install it into the knee by driving it only on the face of the outer race. Here is the tool - put together out of scrap I had on hand. It doesn't need to be pretty, only functional and with some luck, will never have to be used again!
You are working with new bearings, which is why I suggested tipping the knee so that you could lay it down on its back. I'm pretty sure I used a couple of pallets, so that I could lower the knee down and have the bottom sit on the edge, with enough height in the pallets to ensure that the bottom of the screw was above the ground. I then stood behind the pallets, facing the engine hoist and pulled the engine hoist towards me. Doing this allowed the knee to pivot on the bottom-rear edge and I could then bring it to rest on its rear face. Unfortunately, I don't have any pics of the process I have just outlined but it is quite easy if you think ahead, plan carefully and take your time.
When you come to reinstall the knee to the mill, I would screw the nut back on first (I'd unbolt the pedestal and leave the nut attached). The reason that I say this is because the damage that was done to the nut on my mill was most likely due to someone lifting the knee to high and then trying too lower it again.
Hunting American dentists since 2015.


