First casting
#1
First casting and first failure!
I clearly have a lot to learn with this home foundry thing; but I guess if it was easy everyone would be doing it.

I at least managed to get a pattern made and a flask rammed. The pattern is for the broken power-feed gearbox for the Victoria U2 mill.
First rammed half the pattern in the drag
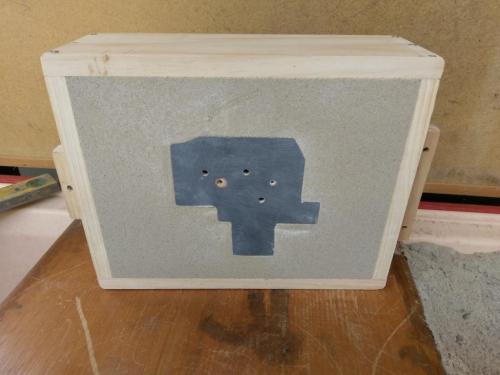
   

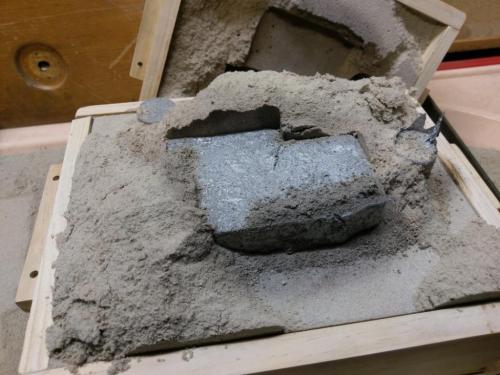
So far so good, put the cope on and rammed the other half, had a little sand-sculpting to do after pulling the patterns
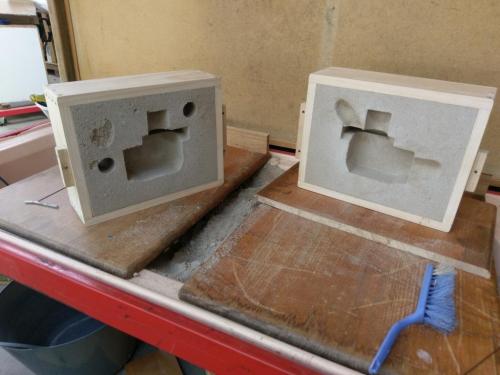
   
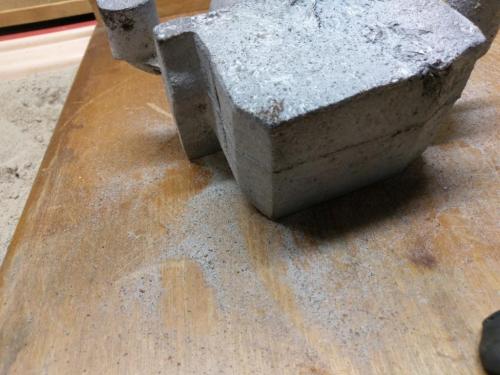
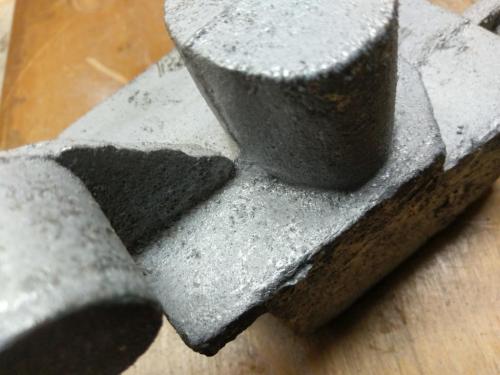
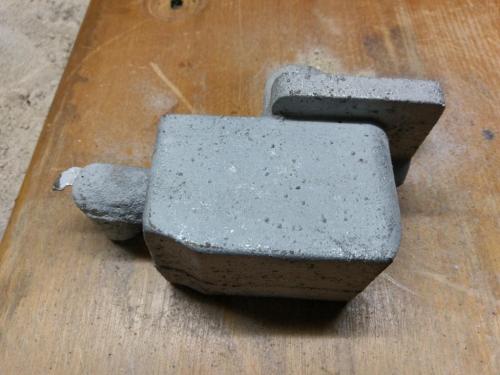
The finish in the cavities was not as good as i would have liked, not sure why but some loose grains came away with the pattern and left a bit of a pock-marked cavity. Also I think the flask was just a tiny bit too small for this pattern, the sprue and riser are very close to the cavity.
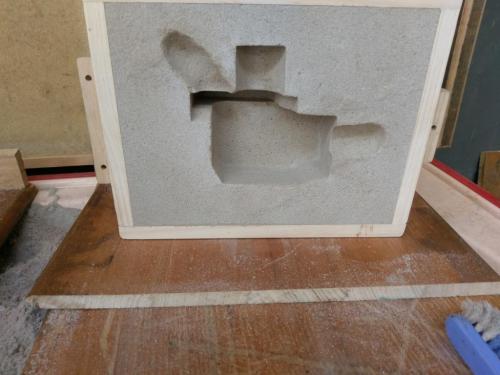
   

I couldn't see into the furnace with it running, wasn't sure whether I had the crucible filled. When I started the melt I was confident I had plenty of aluminium on hand but I started to worry I didn't have enough, I was hunting out little morsels of scrap aluminium to drop in.
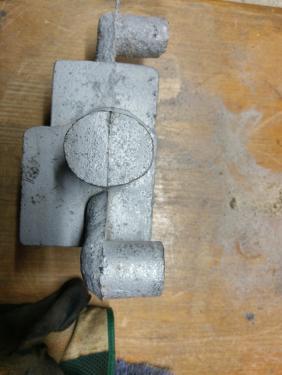
When I shut the burner down and opened the furnace, the crucible was overflowing. Even so, the pour was waayy short. Only half-way up the sprue when I ran out of metal. Going to have to make a bigger crucible for aluminium, this was my biggest carbon-graphite crucible, A8.
Poured the flask on my moulding bench, not sure that I'll do that again- hard to keep the burnt sand separate when breaking out.
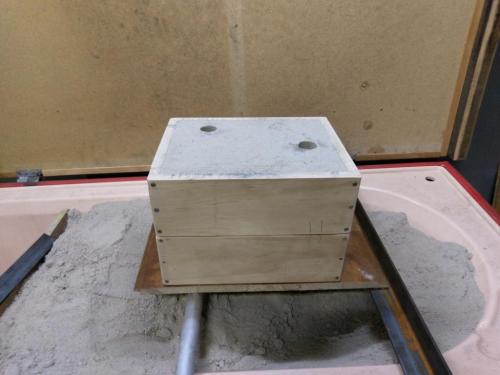
   

Here's the casting, obviously short but any thoughts on why the surface looks so awful would be welcome.
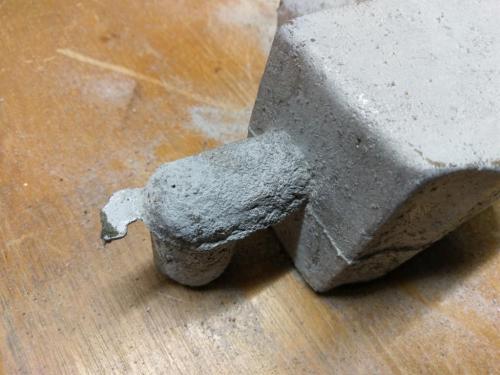


I'll be interested to cut into this and see whether it is porous. At least failures can be melted down. I have a couple of transmission housings that I need to break into useable pieces so I don't run out again during a melt; need to pay more attention to calculating quantities in future too. It looked like a lot of aluminium before I poured it!
I was thinking of putting a core in this casting but decided to keep it simple for a first attempt. I guess it wouldn't have poured short if I had put a core in it; might have to look at that for the next attempt.
Lathe (n); a machine tool used in the production of milling machine components.

Milling Machine (n); a machine tool used in the production of lathe components.
Reply
Thanks given by:
#2
Given the porosity of the surface you'll probably find lots more in the casting.  You stated you could not see in the crucible during the melt.  Take a look at this video https://www.youtube.com/watch?v=Q0HTH2nq2nM to give yourself some ideas.  There needs to be a hole in the center of the lid to allow hot gasses to escape which can be mostly covered by a fire brick during the melt.  This way you can pull the brick to the side and view the crucible and the melt.  If necessary you can simply add more scrap via the vent.

One necessary point is that you place any & all additional scrap pieces on top of the lid so any moisture can be removed.  The coefficient of water to steam is something along the lines of 1600:1.  Any water accidentally introduced to the inside of the melt will in all likely hood explosively empty the crucible.  Google foundry explosions to see the results of a liquid introduced into a melt.

Temp of the pour is also critical.  I have poured aluminum between 1275 & 1300 degrees F with good success.

You certainly do not want to pour on a bare concrete floor as it too contains water.  Use an expendable 4 X 8 sheet of plywood or OSB on which to pour.

Are you using a water or oil based casting sand?  My preference is water based as it is easier to keep a satisfactory level of moisture in the sand.  If you're using water based a quick & dirty test is to squeeze a hand full of sand, open you hand to see if the sand retains its shape.  If it falls apart its too dry.  If it results in water in your hand its way too wet.

Another process is to mull the sand.  There are mullers on the market, but a cheap concrete/mortar mixer works well.  Remove the blades and install a piece of angle iron at an angle to the axis of rotation.

An even cheaper way to mull the sand is to spread out a tarp on the floor and use a garden rake.  Make sure you use the tarp to keep trash out of the sand.

BTW, mulling is used to break up any clumps and evenly disperse dry sand through out your supply.

I was lucky and purchased the USN Foundryman 3 & 2 reprinted by Lindsey Technical Books.  They have closed due to retirement but you may find one on the used book market.


I've probably missed one or more important points which others will remember.

Make an ingot mold out of a piece of 3X3 angle iron or 3 or 4 inch channel iron. Cap the ends so you have something in which to pour the leftover melt.

BTW, for a first pour its not that bad.  Keep it up and learn casting.   Thumbsup
Reply
Thanks given by:
#3
You don't mention if you fluxed your melt.
Reply
Thanks given by:
#4
Yep I used a flux that I got from a foundry supply when I first started to gather materials up for this, it's been sitting on the shelf for at least 2 years. When I think about it, it may have been intended for iron casting- will have a look at it and google the product code, It is in a tablet form. The supplier has since closed their premises near my workplace.

Thanks for the detailed response Stan, if you have a look at my furnace build thread you'll see that mine is very similar to the one in your video link, probably a shade larger. The hole in the lid is about 4 1/2" diameter. Reason I could not see into the crucible was the intensity and opacity of the exhaust flame, with the furnace warmed up and burning oil there is about 12" of orange flame above the exhaust port. Perhaps I was running it a bit rich. With the top of the crucible about 4" below the lid opening, there was too much orange to be able to see into it.

I'm aware of the need to warm & dry scrap prior to adding to the crucible- I did this by holding the pieces above the exhaust with tongs.

I'm using green sand rather than oil based, don't yet have a proper muller but it's on the project list.

I'm wondering if I might have been running too hot for aluminium. I have no way of measuring temperature
Lathe (n); a machine tool used in the production of milling machine components.

Milling Machine (n); a machine tool used in the production of lathe components.
Reply
Thanks given by:
#5
on oil your furnace should look like the one in this video when running. look at the exhaust port you can only see about 3 inches or flame above the exhaust hole.


dallen, proud to be a member of MetalworkingFun Forum since Apr 2012.

If life seems normal, your not going fast enough! Tongue
Reply
Thanks given by: Pete O
#6
Thanks Dave, I was hoping you would chime in. Do you think that means I was running the furnace too rich? I thought that was probably the case when I was getting soot on the tongs etc. I'll have to look out for a tinted face shield like yours, I've been using my old flip-up welding mask.
Lathe (n); a machine tool used in the production of milling machine components.

Milling Machine (n); a machine tool used in the production of lathe components.
Reply
Thanks given by:
#7
I cut a slice off the casting, put it in the lathe and faced it.
I think I've invented a new material. I'm going to call it 'Swisscheesium'.
Next challenge is to find a use for it.

   
Lathe (n); a machine tool used in the production of milling machine components.

Milling Machine (n); a machine tool used in the production of lathe components.
Reply
Thanks given by:
#8
(10-20-2016, 10:57 PM)Pete O Wrote: I cut a slice off the casting, put it in the lathe and faced it.
I think I've invented a new material. I'm going to call it 'Swisscheesium'.
Next challenge is to find a use for it.

It would be perfect to use to make a replacement part for a Chinese machine.   Big Grin

Its been awhile since I had access to a foundry, but may build one.  Actually 2nd one.  First one was coal fired (I was in OK lots of free high sulfur coal) if there is a next one it will be fueled by natural gas.

As you have asked it sounds like its too rich.  You'll just have to experiment to find the correct adjustment.

For a thermometer I used a 2000 degree F meter with a thermocouple on it and inserted it in the melt.  I took a look at a couple of suppliers I've used and came up empty.  In any case I suspect my predecessor cobbed it together as was his tendency.  However it always worked.
Reply
Thanks given by:
#9
(10-20-2016, 10:57 PM)Pete O Wrote: ...Next challenge is to find a use for it.

Easy - you throw it in the crucible for the next attempt.
Hunting American dentists since 2015.
Reply
Thanks given by:
#10
(10-20-2016, 09:02 PM)Pete O Wrote: Thanks Dave, I was hoping you would chime in. Do you think that means I was running the furnace too rich? I thought that was probably the case when I was getting soot on the tongs etc. I'll have to look out for a tinted face shield like yours, I've been using my old flip-up welding mask.

if you don't have enough air for the amount of fuel that your putting into the furnace the flame will climb out of the exhaust hunting for air, one of two things that you can do is 1. increase the amount of air, or 2 decrease the amount of fuel until the flame recedes back into the furnace, and a two foot flame on the exhaust port isn't going to help melt the metal.

as far as what your calling Swisscheeseium, I would just throw it in the pot next time you fire up and not make any more mention of it.


Video your pours, not so much for the rest of us to see what your doing, but so you can see all the stuff that you don't think about when your in the actual pour like that air hose you had to step over or how much easier it would be to make the pour if the mold was say 12" off the ground.
dallen, proud to be a member of MetalworkingFun Forum since Apr 2012.

If life seems normal, your not going fast enough! Tongue
Reply
Thanks given by: Pete O


Users browsing this thread: 1 Guest(s)