Posts: 8,842
Threads: 318
Joined: Feb 2012
Location: Arizona/Minnesota
(10-20-2017, 09:41 PM)randyc Wrote: maybe locking one knob lightly allows a fairly precise adjustment which can then be maintained by locking the other knob
I think you hit the nail on the head with that. Here's the link to the FLM that I bought a few years ago. It's gone up in price but not by much.
FML Ball Head
When it comes to photography equipment, I'm of the "buy once, cry once" mentality. 
But that's because it's a passionate hobby for me.
Ed
Posts: 215
Threads: 22
Joined: Jul 2017
Location: Eureka, CA, USA
Ed,
Very, VERY nice head, in fact the $25 one that I bought appears to be a copy, although not exact, of yours. However yours has just been dropped from my list as a backup, LOL. I was waffling at the thought of $300 for the basic Gitzo (with only a single locking device) and the nearly $500 for the FML makes me choke.
I agree with you that one is best served by spending the $$$ up front and getting the best within the budget rather than having to upgrade later (when inflation has "adjusted" prices). I bought my lightweight Gitzo for hiking and the price has almost doubled twenty years later.
My 27 year old son is addicted to photography and two years ago suggested a Gitzo tripod for his xmas gift. I said "sure" until he gave me the model number and the $800 price tag* My immediate reaction was predictable but I sucked it up and bought it for him. He'll have it for the rest of his life and there's nothing like the feel of quality !
I'll charge ahead at a snail's pace with my bargain ball head - for now - and many thanks for the information !
randyc
* many photographers would regard this as an "intermediate" level tripod -
Posts: 8,842
Threads: 318
Joined: Feb 2012
Location: Arizona/Minnesota
Yea, tripods can get real expensive quick. I think I paid about the same for my tripod that I paid for the FLM ball head. I'll be retiring soon so I bought the expensive stuff while I still had the income to support it. Once I retire, no more fancy stuff for me. 
Ed
Posts: 215
Threads: 22
Joined: Jul 2017
Location: Eureka, CA, USA
The following 2 users Like randyc's post:
f350ca (10-27-2017), JScott (10-28-2017)
I haven’t put in much time on this project – eye surgery, the recovery process, problems with the surgery, etc, etc, etc have interfered. But today I wired up the little motor and tried out the concept, which was successful. A few notes on where I am to date.
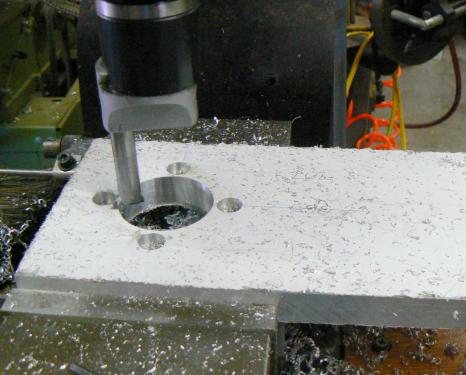
I happened to have a fairly large chunk of ¾ inch (19 mm) jig plate left over from another project and it was a good width for the concept that I had in mind – just a bit larger than the motor diameter plus room for attaching legs (there will be three, configured like a surface plate support).
In the following photo, the jig plate looks strange – this is because it is coated with a white plastic film for protection during machining. After measuring the mounting studs on the motor, I drilled, counter-bored and bored for motor + arbor.
I’ll pause for a moment just to make a comment. Because there were five interfaces from the arbor and the retaining nut to the diamond wheel, I attempted to make the parts that mount the wheel (arbor and retaining nut) in one setup to produce all critical dimensions.
The idea, of course, is that all surfaces that touch the wheel should be parallel, perpendicular and in the case of the motor shaft and the mounting spigot for the wheel, as close a fit as possible without having to use a press.
I went to such finicky extremes as to bore the hole in the retaining nut before tapping it. The parts were not removed from the four-jaw chuck until all critical surfaces were turned and bored.
This presented me with my first problem. I had no boring bar tiny enough to fit in a ¼ inch (6 mm) hole. The motor shaft is .3125 inches (8 mm), the end of which is nicely threaded to 5/16-18UNC-2A or 2B. In order to produce a close fit with the motor shaft, I needed to start with a pilot hole, something around ¼ inches – about 6 mm.
So I spent some thirty minutes of perfect boredom, grinding away at a piece of ¼ inch (6 mm) square HSS. I guess it’s not obvious in the photo (should have posed something to establish the scale reference) but the diameter of the bar is about .150 inches (2 mm). The small boring tool is fitted into an adaptor which is then secured in a large boring bar.
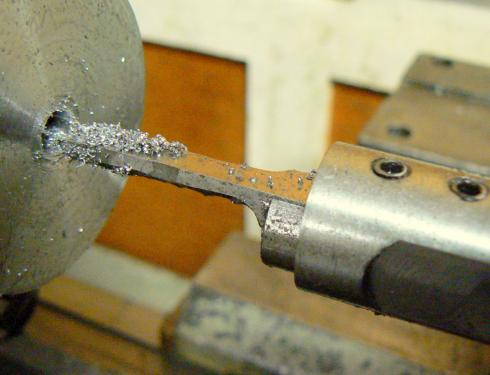
And off we go, boring the arbor, the most critical part of the entire assembly. My intent was to bore to about .310 and then ream to the final dimension of .3125. But sometimes I encounter problems with reaming – different lubricants/coolants produce holes that may vary as much as .0005 (.01 mm) and I was looking for a much better fit on the shaft.
Since the wheel is about four inches diameter, .0005 error in the fit of the arbor to the shaft will be multiplied and might result in unacceptable runout/wobble ! So I spent about fifteen minutes making spring pass after spring pass, trying the motor shaft after each one, until I could push the shaft into the bore with some gentle tapping from the heel of my hand.
In the same setup, the arbor was faced so that it was perpendicular with the shaft bore within the limits of my old lathe. Everything was locked and tightened for this operation. Next, the 1.25 inch (31 mm) diameter spigot fit for the diamond wheel was turned – carefully – until the wheel could be just barely nudged on with my hand.
Although there were no critical dimensions on the far side of the arbor (the side facing the motor), still I wanted to make everything as symmetrical as possible to reduce vibration and consequently runout/wobble. So after placing a 5/8 (16 mm) diameter steel rod in the lathe collet, I turned a short 5/16 (8 mm) diameter mandrel for a light press fit with the arbor hole and then single-pointed a 5/16-18 thread on the end.
I used the tailstock to press the arbor partly onto the mandrel followed by a 5/16 nut that pressed the arbor home, against the collet face. There is no photo but the 2 inch (50 mm) O.D. arbor was then turned down to a 5/8 (16 mm) inch diameter hub. (I neglected to mention that I started out with a rusty old piece of steel about three inches (75 mm) in diameter and by the time that I finished the two wheel mounting parts, most of the steel was in the chip pan.)
Next step was to drill a hole for pinning the arbor to the motor shaft and then to mill wrench flats on two sides of the arbor. This is necessary to hold the shaft stationary while installing/removing the wheel, tightening/loosening the retaining nut. I don’t have a photo of this operation either. It was approaching dinner time and I was tired from a long day.
Backtracking for a moment, I’d started at about 10:00 AM and almost immediately the primary drive belt on the old Sheldon lathe started flapping and beginning to shred. These old under-drive machines have a very sophisticated drive system, a marvel of mechanical engineering in some respects.
BUT whoever designed the drive clearly didn’t have to work on it. I actually have a maintenance manual for this machine and after struggling for a while, I consulted it for removal/installation instructions. I could NOT believe it when the caption read “installation and removal of primary drive belt is self-evident”. Not to me !
It took nearly an hour, working with a flashlight in my teeth, just to remove the old belt. It finally came off with the creative use of several C-clamps (which makes me think that there must have been a special tool). Drove to the nearest auto parts store, of course.
The young man behind the counter asked, “What vehicle did this come from”. Without blinking, I replied “1945 Sheldon EXL”. He almost walked away to look at his master belt catalog, ha-ha-ha. He found a belt that was the correct length but only 3/8 (9 mm) wide. Finally, he found a ½ (12.5 mm) wide belt just a tad larger than the original.
It now works but there are a few bolts and washers left over from the adjustment system. It’ll do until I can get a replacement from Browning at which time the leftover parts will be re-installed.
The next day, I made the retaining nut, from the same chunk of rusty steel. I should note that both the arbor and the retaining nut are substantial pieces of work, together with the wheel weighing about 4 pounds (2 kg). I could have made both from non-ferrous materials but on the advice of the man whom I most respect (both engineering AND machining/fabrication), I put as much weight as practical on the end of the motor shaft to reduce “float”.
First chore was to drill .226 inch (5.6 mm) x ¾ inch (19 mm) and then bore it with the skinny little boring bar to .256 (6.4 mm) followed by tapping and facing. Removing from the four-jaw, the part was threaded onto the mandrel that I’d made for the arbor (remember that the end was threaded) and drove it home with a nut then turned the features on the back of the nut.
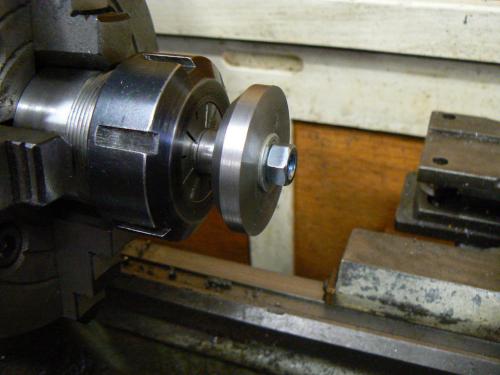
BTW, you haven’t LIVED until you’ve parted a three inch diameter chunk of rusty steel, ha-ha-ha. Just looking at the blade sticking out over 1-1/2 inches gave me shivers but all went without drama.
As I’ve mentioned elsewhere, a heavier feed than intuition suggests will often calm down chatter, all other parameters being correct. And never take for granted that the parting tool is on center ! Most QC parting tool holders angle the blade slightly upward. If you move the blade in or out, of course the blade is no longer on center !
I milled two spanner slots in the top of the retaining nut for tightening/loosening.
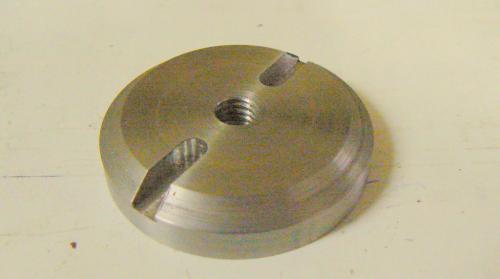
The arbor was tapped gently onto the motor shaft and pinned then the assembly was mounted to the baseplate. With wheel installed and secured with the retaining nut, I was ready to take it for a test drive. Until I realized that the dangling wires beneath the motor weren’t connected to anything.
After temporarily wiring the motor, here we go on a trial run. I should note that the wheel has not yet been dressed (I have a plan for dressing the wheel with the entire assembly held on the vertical mill). Nevertheless, the runout/wobble was impressively low. After temporarily clamping a cutting tool on the tripod head, I started grinding (polishing might be a better description, LOL).
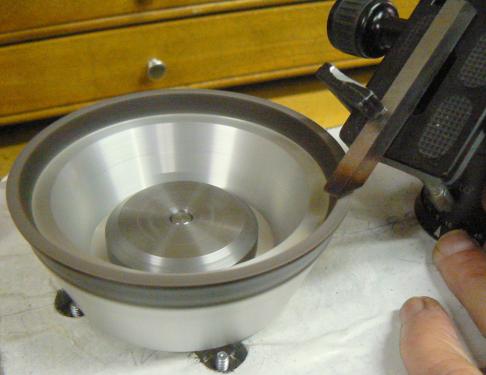
I made no effort to cool the tool during the process – I just wanted to check it out quickly, it was time to relax with a beer. The little motor purred quietly, there was no perceptible vibration caused by imbalance. (At this point, the contraption is parked on top of a couple of 2 x 4’s on my workbench.)
This is a very interesting photo, taken on my kitchen table. What appear to be horizontal lines from the grinding operation are not. What you observe is the reflection from a kitchen window with the Venetian blinds half-way down. The horizontal lines are the slats of the blinds and the bright spot below them is the open window.
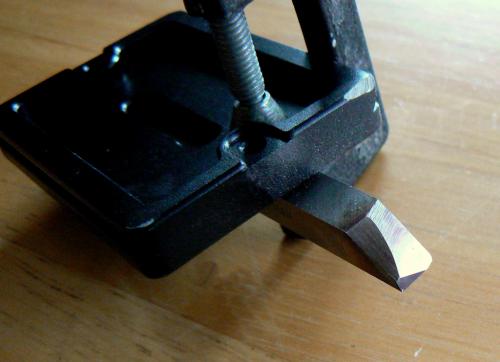
OK, the acid test: was the cutter sharp ? Judge for yourself:
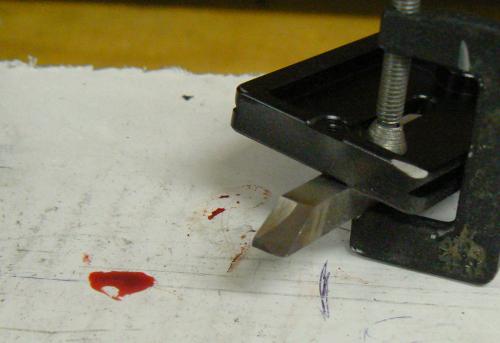

This isn’t actually as bad a laceration as it appears to be. The cut was a small one, near the fingertip. The blood just dripped down the finger because I was holding it vertical.
At this point I’m somewhere in the neighborhood of half done. Clearly I wanted to test the concept before investing a lot of time in the project (although I probably have fifteen or twenty hours in it already !!!).
Cheers -
Posts: 8,842
Threads: 318
Joined: Feb 2012
Location: Arizona/Minnesota
Posts: 3,003
Threads: 51
Joined: Apr 2012
Location: Ontario
Great read Randy. Your attention to detail is incredible, and the results speak for them selves.
Free advice is worth exactly what you payed for it.
Greg
Posts: 215
Threads: 22
Joined: Jul 2017
Location: Eureka, CA, USA
Thanks, but my work is not in the same league as most of you guys (I'm still losing sleep over those HLV's) who make perfectly functional parts and also make them look BEAUTIFUL.
Posts: 215
Threads: 22
Joined: Jul 2017
Location: Eureka, CA, USA
The following 4 users Like randyc's post:
f350ca (11-03-2017), Mayhem (11-04-2017), EdK (11-04-2017), JScott (11-04-2017)
Another important part(s) to be made is the workholder. I wrote earlier that from now on I was going to think things out and actually “design” the item and I sure tried, ha-ha-ha. I sketched out three or four variations of a work holder. All of them were plausible IF the application involved larger work.
Even though it wasn’t yet clear in my mind what the work holder should look like, for sure it needs to fit the dovetailed platform of the ball joint. I’d envisioned the workholding platform to be a sliding, low-friction, manually reciprocating work holder. That may change, however.
Still lacking a design for the work holder, I thought that I’d go ahead and make a dovetailed platform that could be tailored once the final design evolved. The blank was ½ inch (12.5 mm) thick, low carbon hot rolled steel plate (nasty stuff). After sawing and milling to finish length and width, taking a 10 mil cut on either side to remove scale, I cut the dovetails.
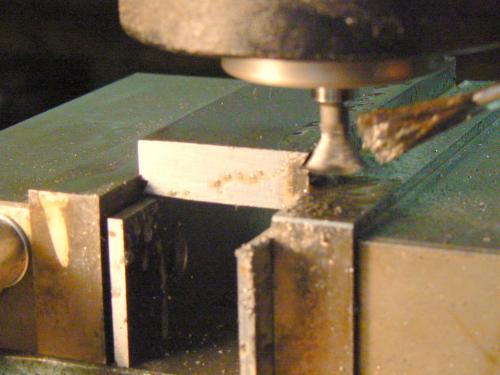 I reasoned that it would be a good idea to cut dovetails on both top and bottom sides of a long workholder. I thought that this would give me several areas to custom machine for individual grinding fixtures. Before dovetailing both sides, I tried a single side for fit, sliding friction and tightness of lock-up. The fit being satisfactory, I completed the remaining dovetails.
At this point, I had an idea. I like toolmakers vises and own a couple of them, one full-size version and a small (one inch- 25 mm) duplicate that is useful for working on small, delicate parts. This is the large one, the smaller vise is approximately a one-quarter size version of this one.
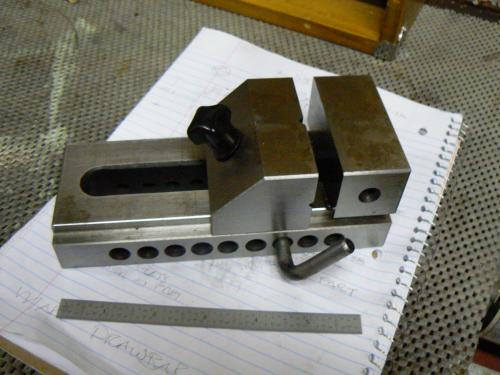 Most, if not all, of the parts that I would likely grind would be small and the little vise seemed a good way to hold them. Note that there is a definite disadvantage to using this style of vise. The design is intended to apply both clamping pressure and a downward load to prevent the movable jaw from lifting.
However the angular clamping increases friction as the vise is tightened and as the angle changes, eventually zero clamping pressure on the workpiece results, all of the pressure becomes vertical. Obviously in certain circumstances this is of serious concern.
These devices were originally intended for surface grinders and other light operations that exert small cutting loads. They are, in my personal opinion, not suitable for normal milling operations although people use them for this purpose, apparently with satisfaction.
A vise with insufficient clamping pressure can, at best, ruin the workpiece and, at worst, cause physical harm !
However for my application, this type of workholder would seem to be ideal. After all, it is a grinding operation, for which the vise was intended, and the amount of material being removed is very small.
Mounting the little vise on the end of the platform rather than on top of the platform, as I’d originally envisioned, seemed like the best idea. Happily the Asian manufacturer had thoughtfully provided tapped holes on both sides of the vise. This was fortunate since the entire vise is hardened and, for me, tapping holes would not have been possible.
The holes looked like #8-32 but the #8 screw was too large. I tried a #6-32 screw but it was too small. I tried all of my metric taps in the range of the major diameter. No luck. But the #6-32 seemed, by feel, to be the correct pitch. An uneasy thought occurred to me and it turned out to be correct ....
Who knew that there was a #7-32 screw and WHY would a Chinese designer choose to use that thread ?
Googling #7-32 produced a surprising number of hits. Apparently many people have experienced this problem in various forms. One person suggested a major diameter of .150 inches for making a #7 screw. This is plausible since it is the mean of #6 and #8 major diameters. (I'm sure that the dimensions are thoroughly documented in "Machinery's Handbook".)
My first thought was to modify an #8-32 screw by first turning down to .150 (~ 4 mm) major diameter and then single pointing the existing 32 pitch threads a bit deeper, to the required minor diameter. Well, that worked but it wasn’t pretty. I could have tried the same thing on a #10-32 thread but frankly, holding the head of screws in a workholder not designed for the purpose is clumsy and insecure.
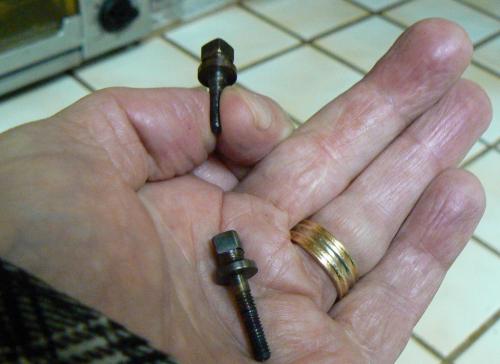
I decided to make a couple of screws from oil hardening tool steel so that they could be hardened. Further – and for no good reason other than I like them – I decided to make the screws in the configuration of square headed half-dog screws. These are universally used on older lathes for clamping purposes and I like old machinery so …...
There happened to be a short length of ½ inch (12.5 mm) diameter O-1 lying in the chip pan under the horizontal bandsaw – perfect. The length was WAY long enough to accommodate the full collet length, preventing springing and bell-mouthing.
Since I needed only two screws, it seemed convenient to make them from both ends of the rod, turning the rod end-for-end and duplicating each operation, rather than handling two small parts. I first turned the major diameters for the #7 threads and then transferred to another lathe:
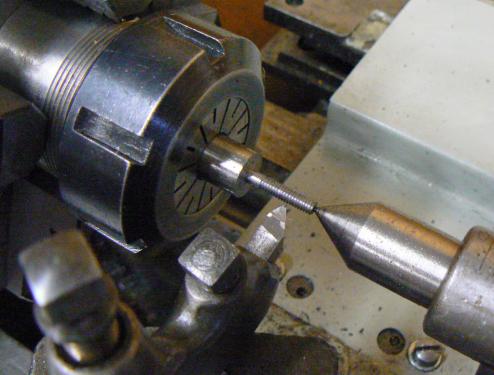
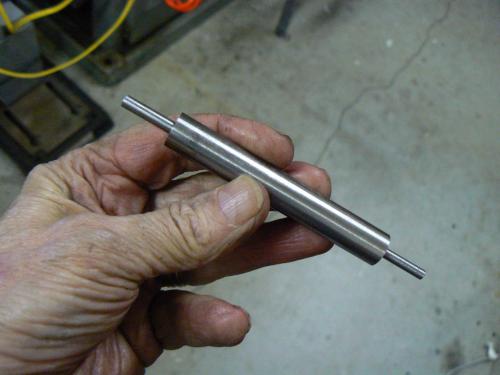 The Emco-Maier "Compact Eight" lathe uses loose threading gears so it was easier to use my Sheldon EXL-56 lathe with QC gear box to set up the 1/32 inch lead. The Emco, because of its compact, short, solid structure and its collet system, is better for making small parts that don’t exceed eighteen inches (46 cm). It is simply easier and more handy to use than a larger machine.
Little parts are often a PITA to machine (and to de-burr) and this operation was a typical problem ! Because of the short distance between collet and tailstock center, for single-pointing these threads the old lantern and Armstrong tool holder was my first choice.
Neither a 4-way nor a QC would fit in this small space with enough freedom and travel to cut the threads. I suppose that a long cutting tool like a boring bar with a sixty degree cutter could work, allowing the tool holder to be distanced from the work. But why monkey around making a new tool when the trusty lantern and the Armstrong holder has worked for a century ?
By the way, this is just one reason for using the old system: the ability to “sneak” into restrictive areas. But there are many other reasons and I think that most of us would benefit from having some of this (quite) inexpensive tooling stored (along with the face plate and lathe dogs, LOL).
Note the use of a dead center - a live center would take up more of the already limited work envelope available. A live center is definitely not needed anyway. Most single pointing is performed in back gear and there is little stress on the dead center, just give it a drop of oil occasionally.
 After single-pointing both ends of the rod, I secured it in a 5-C collet held in a four-sided collet block then installed it in the milling vise. I milled all four sides to the ¼ inch square head that I’d decided was in proportion with the #7 threads. Then removed the rod from the collet, turned it around and milled the other end identically.
Note that I’m still working with the four inch long piece of O-1, not two little pieces, so workholding has not been a problem. I put the rod back in the Emco-Maier lathe, turned a groove under the square head (to remove milling tool marks) and parted the screws from the rod.
Now two small pieces must be held in the lathe and the first unforeseen problem was encountered. Although ER-40 collets are claimed to accommodate 1/8 to 1 inch (3 to 25 mm) with no gaps in coverage, this was not the fact. The .150 (~4 mm) major diameter of the screws could not be forced into a 1/8 collet nor could a 3/16 collet be tightened securely enough on the screws.
I was at a total loss at this point and almost replaced the collet system in the Emco with a four inch (100 mm) 4-jaw chuck. But that also would have been a PITA to use with these small parts. I had another thought: how about securing an Albrecht 3-jaw drill chuck in a collet and using the Albrecht to hold the screws ?
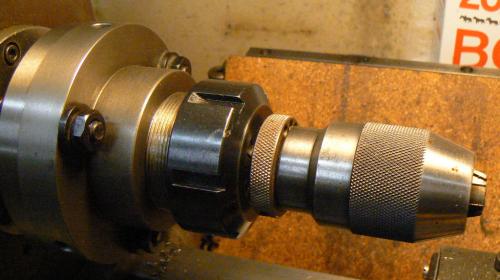 Happily the Albrecht runout was minimal enough to hold the threaded lengths while I finished the remaining operations on the heads of the two screws. If I did this again, I would definitely center drill and support the heads of the screws. (If center drilling was a problem, then a small spud, backed up by a live center would be my choice.)
These are the finished and heat-treated screws:
 Next chore was to make a mounting device for the toolmaker’s vise, to securely attach it to the vee-grooved work platform. A remnant of the piece of hot rolled steel was still in the vise of the horizontal saw, so a piece of that would end up mounting the vise. I squared the stock to dimensions and drilled/counterbored mounting holes for the vise.
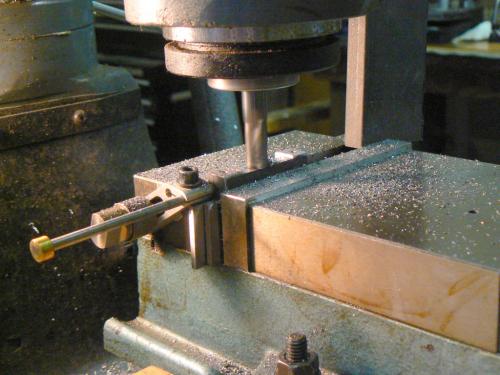 This is a routine operation so one may wonder why I even included the photo. The reason is that the workpiece is held only on one side of the mill vise - the vise will tilt slightly, causing uneven wear, so I've inserted a scrap piece of steel, the same thickness as the workpiece, on the right side of the vise jaws to equalize the load on them.
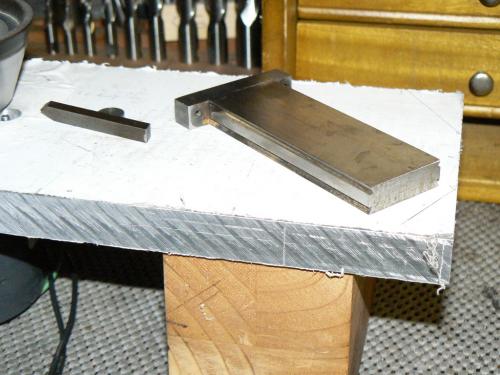
After cleaning the parts, I silver-soldered the "mounting bar" to the dovetailed work platform. This simple process requires only a couple of minutes and makes a fairly strong joint. In the photo, there is no silver observable at the joint of the parts. My hands are very shaky and I didn't trust myself to make a clean join by feeding the silver into the joint.
I made a long loop of solder, placed it on the anvil of my vise and flattened it well with a hammer. Applying flux to both parts first, I placed the flattened solder between them. Standing the dovetailed part vertically with the corresponding part on top, both parts were heated with a rosebud O/A torch until the joint was made. This technique eliminated the problems that would have resulted from my unstable hands.
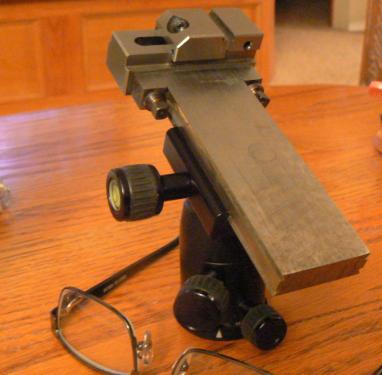
 The work holder finally ended up like this - the little vise of course is attached with the #7 square head screws. A scale can be established from the size of the eye glasses. It's a compact little assembly.
 But I became dissatisfied at this point for some of the following reasons:
(1) In the same length of time required to make these screws, I could have made a hex cutter for my rotary broach (http://www.metalworkingfun.com/showthrea...ary+broach) and made two "proper" #7-32 hex keyed socket head cap screws. I would have two serviceable screws and also have another broaching tool, which is always desirable.
(2) There was so much repetitive work (e.g. single pointing the threads, milling the squares) that I had a lot of time to think about my design and I concluded that it doesn't need to be this complex, I had a simpler idea that doesn't include the square head screws.
The new concept will require three #7-32 FLAT HEAD screws, ha-ha-ha, so I have to do this single-pointing chore again. Since I spend only an hour or so a day on this project, the next episode will probably be at least a week away.
Cheers !
Posts: 215
Threads: 22
Joined: Jul 2017
Location: Eureka, CA, USA
The following 1 user Likes randyc's post:
JScott (11-08-2017)
I cannot seem to make up my mind how I want to mount the little toolmaker’s vise, so I decided to drill the dovetailed plate in such a way that I can mount the vise in three different orientations. I also thought to cut down the dovetailed plate to the bare minimum required to hold the vise (to reduce a little weight). I’ve changed my mind about that as well. It’s a lot easier to remove material than to add it back so I’m going to use the thing for a while before determining a final configuration.
In the meantime, however or whatever I choose to do, I’m tired of fooling around with the #7-32 screws !!! (The Chinese engineer who specified this thread needs to repeat his human engineering class.) For the last time – I swear it – I set the lathe up for the 32 pitch threads and single pointed eight short threaded aluminum rods.
This time, since the material was soft, the threaded length short and well-supported, I didn’t require a dead center and was able to use the QC toolpost. There was plenty of access for the cutting tool so the lantern toolpost and Armstrong holder were unnecessary.
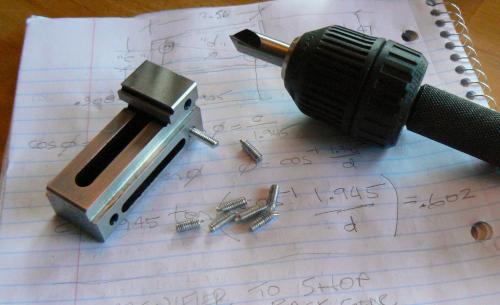 After boiling the vise and the screws for a few minutes in water with detergent, I rinsed thoroughly with hot water, dried the parts, rinsed again with alcohol and allowed to air dry. The idea, as some have likely already guessed, is to eliminate the need for #7-32 screws by epoxying the aluminum #7-32 inserts into the vise and then drill and tap them for #4-40.
I considered drilling and tapping in the lathe, eliminating a set-up in the vertical mill but I was afraid of breaking the part due to the thin wall thickness between the #7-32 minor diameter and the #4-40 major diameter.
#4-40 is a pretty small screw but there will be two, minimum, and the load for this light grinding is nearly negligible. For curiosity, I calculated the load required to shear a single #4-40 stainless steel screw (minor diameter .080 inch, yield point of 75,000 PSI) to be 377 pounds.
This would be the figure expected in ideal lab test conditions – field conditions, for various reasons, would reduce that figure by 2 or 3 times. In any event, as noted the loads are light. And if a magnetic chuck can hold work for light grinding, a #4-40 screw will have no difficulty.
I warmed the vise a bit, so that the epoxy (Loctite EA 1-C) would thin and flow well. I applied a bit to each of the eight mounting holes, screwed in the threaded inserts and allowed the epoxy to cure for the recommended 24 hours. After sanding down the protruding ends of the inserts:
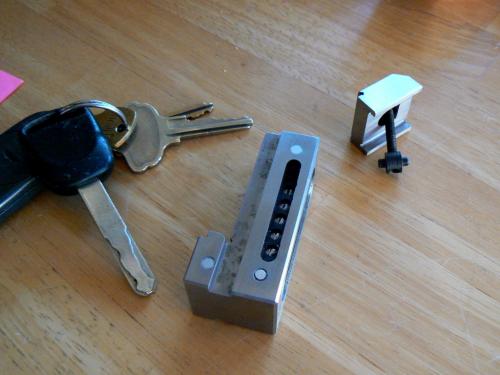 I had carefully measured the hole locations before epoxying the inserts. After securing the vise in the mill (the 1-2-3 blocks are used for support only) I dialed in the locations of the holes to drill and tap #4-40 into the inserts.
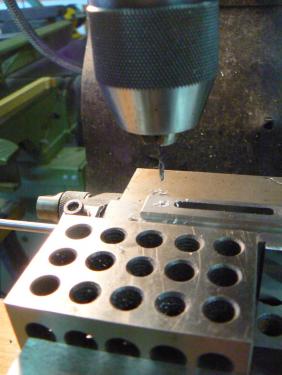
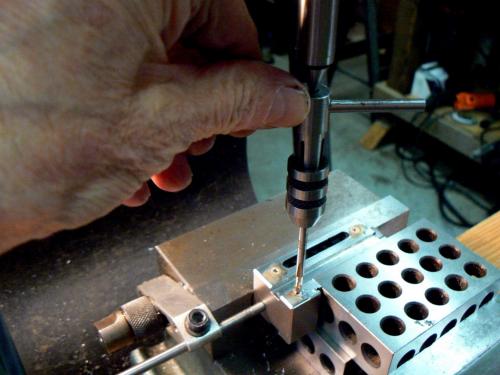 As always happens, seven of the eight holes were incident-free but on the final hole, the tap broke as soon as it entered the hole. Taking a close look, the cause was obvious:
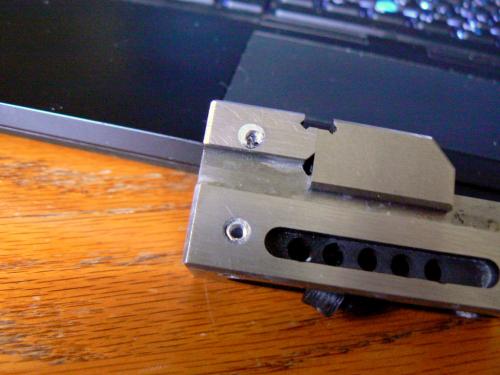 The hole location was off quite a bit, causing the tap to try to cut into the hardened tool steel of the vise. Clearly there has to be a loser in that competition. This was my fault – I measured one side of the vise and presuming that the hole pattern was duplicated on the other side, I used the same dimensions.
Of the three holes located on that side, two were correctly located and the third – for some obscure reason – was mis-located by the manufacturer. Had I noticed, I could have plugged the hole and re-drilled. Now my options are to use a carbide end mill to cut away the broken tap and repeat the plugging process or (if the gods are smiling on me) break up and chip away the piece of broken tap, which is small.
At this point, I wish that I’d at least tried to single-point AND drill/tap in the lathe, ha-ha-ha. I'm calling it a day.

Posts: 215
Threads: 22
Joined: Jul 2017
Location: Eureka, CA, USA
The following 3 users Like randyc's post:
EdK (11-09-2017), f350ca (11-09-2017), JScott (11-10-2017)
Well, I’m back to where I was several days ago. Here’s what happened yesterday:
I wasn’t lucky enough to be able to remove the broken tap by shattering into small pieces. I’ve read that suggestion many times over the years but it’s never worked for me. Nor have those cute little tap extractors (come to think of it, E-Z outs and I have had running battles, too).
Thinking about my woes with broken taps over the years, I’d like to diverge for a moment with a really weird story.
About fifteen years ago I broke a tap – also a #4-40 – in a Mauser receiver. I was active on PM at the time and posed the removal question in the gunsmithing part of that forum. I received the standard answers and one that shocked me. The guy who suggested it made the provision that it was a last resort but that it had worked for him.
For some reason, I didn’t think of using a solid carbide end mill at the time and I’d (mentally) exhausted my other options so I decided to try the unorthodox suggestion. Incidentally the Mauser receiver was a 1893 model and they were fairly easy to come by at the time so I wouldn’t have lost much if I’d ruined it.
I clamped the receiver in a vise and fired up my O/A torch with the smallest tip. Yep, he’s REALLY going to do it ! Following instructions and with as much precision as I could muster, I quickly heated the piece of tap red and then cranked up the oxygen on the mixing chamber. Bingo, blew the little pieces of tap out the receiver and bob’s yer uncle.
A factual anecdote and incidentally, I’d never try that again – the stars and planets were in perfect alignment on that day and at that time !
Returning to the current difficulty, I placed the little vise back in the set-up in the vertical mill and installed a solid carbide 1/8 inch end mill in the spindle. The highest speed on my mill is 3200 RPM, which is considerably slower than a 1/8 inch diameter carbide end mill should be running but I set the speed to 3200 having no other choice.
(I should point out at this time that I’ve also tried this carbide end mill trick in the past with about 30% success. The secret is slow, consistent downfeed so that the tips of the cutter don’t suddenly run into something and chip off. That’s hard to do with a broken tap because the cut is nearly always an interrupted one.)
Feeding as slowly and carefully as I could, I was able to mill out the broken tap, the aluminum insert and even a tiny bit of the hardened vise, ha-ha-ha, sparks occasionally flying out of the hole.
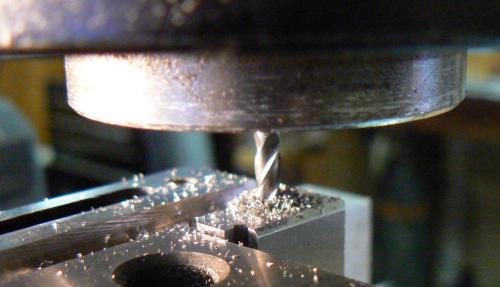
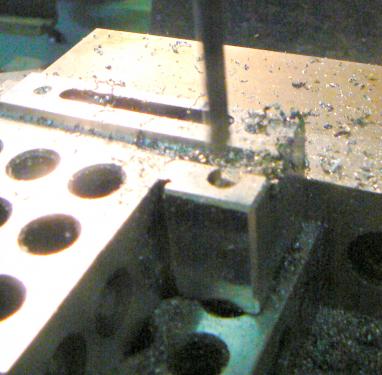
I found a 3/16 carbide drill and opened the hole up:
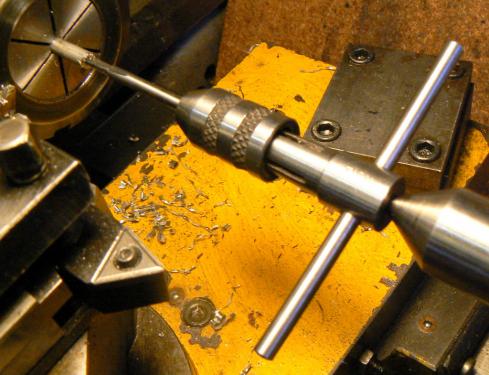
Now to make a new insert but THIS time I tapped the #4-40 hole while the insert was still in the lathe:
Epoxied the insert, as before and allowed to cure after which I cleaned up the area with some emery paper. One more tiny drama concluded.
|


