After some noodling and Goggling, two trips to Harbor freight, one to Menard's and one to Home Depot I determined that the plan with the most likely chance of success would be the original one ... drag the engine hoist from the garage to the basement and have at it ... i.e. just get started and work thru the issues as they come up. Luckily HF, Menard's and HD have excellent return policies so items related to 'not my best ideas' were easily returned.
At first glance that would seemed to have been the intuitively obvious answer but there are several "wrenches in the works".
One is the space constraints in the basement. While there is enough room to attack the lathe from either end in some areas of the basement there is not enough room in the lathe's final location. In the final resting place the engine hoist would need to be "from the front", not "from the end".
The "from the front" then has to deal with the foot brake. It runs all the way across the front of the lathe and would be a little over 4 inches from the floor. While the long legs of the engine hoist would fit under the foot brake when it is on the dollies, allowing me to easily pick the lathe up, the legs are 7 inches high so setting the lathe down on the floor would be a challenge. I have to admit I am rather proud of myself in that I measured before I tried rather than the "pick the lathe up, remove the dolly, try to set it down, oops" I would have normally used.
Given that the plan was to "figure it out as you go" the foot brake issue was tabled and I started to do what I could.
Starting with the head end I put the 1 inch pipe into the two holes conveniently placed in the base, lifted the head end of the lathe, cut the pallet in half with the sawsall and then set the head end back down on the dolly.
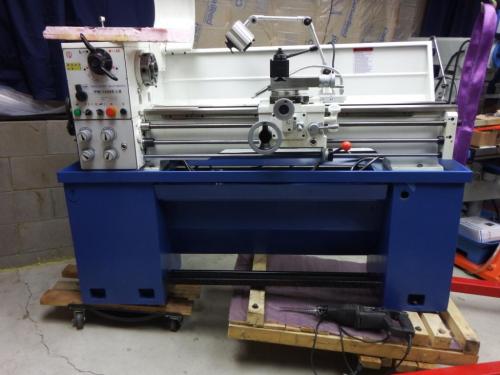
With the head end having gone smoothly I addressed the tail end. I took the 1 inch pipe and put it in the hole on one side of the base but it would not come out the other side. Both holes were the correct diameter but for what ever reason they were not co-linear. I could easily put the pipe into either hole but it would not like up with the other hole and come out the other side. It was "darn close", but not "close enough".
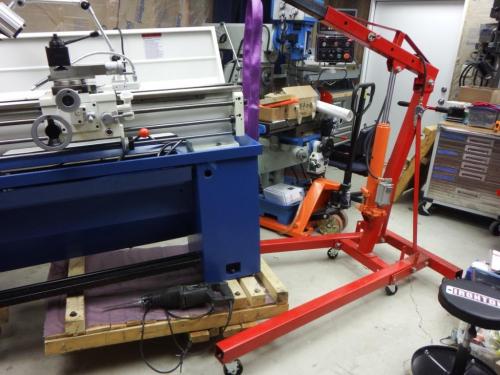
About 20 minutes of work with the Dremel and coarse sanding drums and the holes were converted to "close enough".
It now became obvious that the back splash would be in the path of the lifting strap so I removed it. "One Person" removal was not a big issue but I anticipate "One Person" installation with the final resting place very near the wall will be exciting. Anyway I eventually managed to get the rest of the pallet off the bottom of the lathe and set it back down on the dolly.
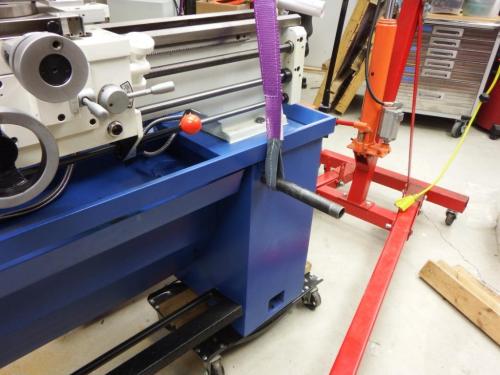
Confident that the end was insight I began installing the foot pads. I had purchased 8 of these ...
http://www.use-enco.com/CGI/INPDFF?PMPAG...&PMCTLG=01 ... for another project so 6 of them were re-purposed for the lathe. A quick measurement told me that the stud that comes with them was too long to safely fit in the pocked of the base but a quick trip to the garage, the 4x6 band saw and the belt sander resolved that issue.
I lifted the tail end of the lathe, installed the foot pads and set it back down on the dolly. Wash, rinse, repeat at the head end. I then rolled the lathe over to the final resting place and made some measurements for room and squareness to the wall. Some quick calculations and with the pads under the base I figured that the foot brake to engine hoist leg interference was now only about an inch ... or to put it in other terms it was now something I thought I could manage if I extended the engine hoist arm all the way out to the 1/2 ton position [given that I was only lifting one end of the lathe at a time I thought even the heavy end would be safely withing that specification] and had a suitable pry bar for last second position tuning.
A little while later the process was complete ...
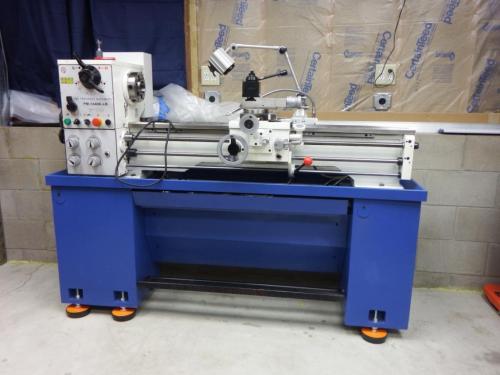
I will now spend Thanksgiving putting stuff back on the lathe, running the gearbox thru the break-in procedure, then changing the gearbox oil and cleaning everything up. That will be co-mingled with occasionally helping Bev prepare our Thanksgiving meal and eventually a great turkey, dressing, sweet potatoes and wine.
Thanks to everyone who has offered suggestions!!


 .
. .
.![[Image: agj146-hydraulic-spreader-duckbill-1-2-ton-cap-3.jpg]](http://assets.suredone.com/1599/media-photo/agj146-hydraulic-spreader-duckbill-1-2-ton-cap-3.jpg)
