Posts: 1,520
Threads: 157
Joined: Feb 2012
Location: uk
hi don't panic right the spring 1 full turn shod be enough but check that it dus not over wind when you operate the plunger as for the hand the proper way to culler it is by polishing to a mirror finish then change its culler with heat but all I do is give it a good clean then go over it with a indelible ink marker don't pant as this will mack the hand bigger and heavy
krv3000, proud to be a member of MetalworkingFun Forum since Feb 2012.
Posts: 1,827
Threads: 51
Joined: Apr 2012
Location: Oklahoma
if you want the hand blue, polish it up all nice and shiny, degrease it then lay it on a piece of steel and heat from the bottom until it gets the nice deep color on it,
WARNING it may end up anything from light blue to a deep blueish purple color.
But its easy to do, tiny watch hands can be a pain to do.
dallen, proud to be a member of MetalworkingFun Forum since Apr 2012.
If life seems normal, your not going fast enough! 
Posts: 4,367
Threads: 177
Joined: Feb 2012
Location: Missouri, USA
Thank you Bob!

I had a feeling that painting the hand would be detrimental to it's operation. I love your idea about using the marker. I have plenty of Sharpies around here. I spent some time cleaning up the parts in my ultrasonic cleaner today. Most of them came out clean, but the brass parts were still covered in dried up grunge and dull looking. I ran those through again using some ammoniated horology cleaning solution (for cleaning clock parts) and they came out shining like a new penny. I still need to polish up the bezel a bit and do the same with the hand now. All in good time.
One more question... Where should the pointer be when the indicator is at rest? Most of the pictures I've found on the net has it at the 9:00 position. Is that about right? I wish this thing would have moved before I had to take it apart to break everything loose. That would have answered a lot of these questions.

The reason this thing was stuck was because someone else had been in there before me. One of the bezel retaining screws is missing (don't know
where I'm going to find one of
those...) and the upper brass bushing for the stem was buggered a bit and corroded. I ran a reamer through it and got it opened up again. The stem slides right through now.

Willie
Posts: 4,367
Threads: 177
Joined: Feb 2012
Location: Missouri, USA
(08-30-2015, 04:16 PM)dallen Wrote: if you want the hand blue, polish it up all nice and shiny, degrease it then lay it on a piece of steel and heat from the bottom until it gets the nice deep color on it,
WARNING it may end up anything from light blue to a deep blueish purple color.
But its easy to do, tiny watch hands can be a pain to do.
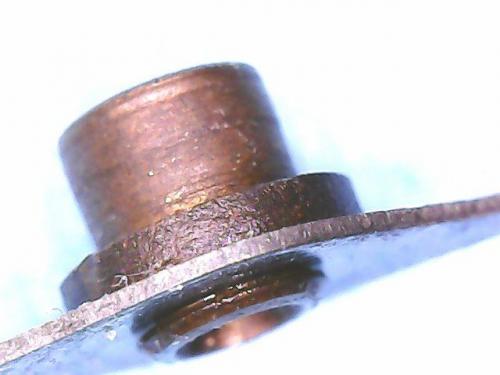
Thanks for the tip David, but there appears to be a fiber washer/insulator between the hand and the "hub" it's swedged on. I would be afraid of burning up the washer and then the hand would be loose and just spin. I could be wrong but that is what it looks like to me.

I've used that method to temper small flat springs in the past though. It works a treat because you can more easily see the colors change.

I'll try to get a picture of the "washer" a little later...
Edit: Well I was wrong David.

After having a closer look under a USB "microscope" what looked like a fiber washer to my nekid eye is actually bubbled up paint or plain old built up crud. It's not a washer at all... it's a flange that is part of the hub.

Willie
Posts: 1,520
Threads: 157
Joined: Feb 2012
Location: uk
hi well where the hand sits depends on the clock ie the travel of the plunger if it has a long travel then 9 o clock is ok for preloading the clock but if it has a short travel I set them to 12 o clock but I ant come a cross a stranded place to put it as I sed you can heat it up but I don't like that as I have tried in the past and the time taken to prep the hand and so on I find the felt tip a porch much beater and all the ones I have dun are still going strong one thing you must not do is over oil it all I use on the ones that I have dun is starret instrument oil
krv3000, proud to be a member of MetalworkingFun Forum since Feb 2012.


![[Image: M2314_1.jpg]](http://www.surplusshed.com/images/items/M2314_1.jpg)


![[Image: M2314_1.jpg]](http://www.surplusshed.com/images/items/M2314_1.jpg)


![[Image: TomsTechLogo-Profile.png]](http://tomstechniques.com/wp-content/uploads/2013/11/TomsTechLogo-Profile.png)


