Fixing a Leaky RF-45 Mill Head - Grizzly G0519
#21
(05-05-2012, 09:34 AM)EdAK Wrote: Henry,

That brown sludge is rather disgusting. I was pleasantly surprised when I found very little foreign matter in my mill head.

Ed

Yes it is bad. Worse is to think that the sludge probably got inside of my bearings. Although they are sealed, I'm sure they got contaminated with the sludge. It gave me a good reason to replace all the bearings.
henryarnold, proud to be a member of MetalworkingFun Forum since Apr 2012.
Reply
Thanks given by:
#22
Here's the top of my head with the gear train still in place.
   
I removed the shaft that the motor drives using a socket of the same size as the shaft. A light tap with a rubber mallet was all it took
   
I removed each of the gear shaft end bearings with this gear puller/separator. There are 5 of these smaller bearings.
   
Two of the gear shafts have a plastic plug cover the end of the shaft. I used Ed's idea of drilling a small hole and inserting a screw to use as a pull to remove these plugs (not shown). After the plugs are out you need to remove the circlips on each of the holes (again not shown). The circlips are laying under the head in this photo.
I used Ed's technique of suspending the head lid over two pieces of wood and then using a socket of the correct size to tap out the gear shafts with bearings. The shafts came out with light taps of a rubber mallet.

   
henryarnold, proud to be a member of MetalworkingFun Forum since Apr 2012.
Reply
Thanks given by:
#23
Here's the head lid with the shafts removed.
   
Here are my gear shafts. The brown on the gears is not rust. It some kind of slimy residue which I have not been able to identify.
   
I removed the rest of the smaller bearings from each of the gear shafts using a Harbor Freight puller.
   
This is the Harbor Freight Gear Puller #93980 which I used.
   
henryarnold, proud to be a member of MetalworkingFun Forum since Apr 2012.
Reply
Thanks given by:
#24
I removed the large bearing on the end of the quill gear shaft using the gear puller. Notice the large washers Iused for backing plates to push against.
   
This photo shows the seal for the motor drive shaft. The spring was broken. I decided to make a tool to push this seal out and later install a new one.
   
First remove the large circlip
   
henryarnold, proud to be a member of MetalworkingFun Forum since Apr 2012.
Reply
Thanks given by:
#25
Cutting off a nice chunk of 2.5" round aluminum. Length is not important but make it long enough to reach and push the seal.
   
1 hour of lathe work. I made a 2 sided tool for the seal on the motor and seals on the quill gear shaft.
   
The finished tool. This tool assures that the seals will not be damaged when pressing them into place. The small end is for the quill gear shaft seals and the large end is for the motor gear shaft seal.
   
Using the tool to remove the motor gear shaft seal.
   
Tomorrow: Dis-assembly of the quill and tapered bearings.
henryarnold, proud to be a member of MetalworkingFun Forum since Apr 2012.
Reply
Thanks given by:
#26
I don't have a clean tank so I used my shop sink with Dawn soap. I dried it off well to avoid any rust.
   
Here's a closeup of the brown muck that was inside my mill head. Obviously I cleaned all of this out.
   
I painted the interior with an industrial oil base paint. The proper paint is called Glyptal but it costs $50/quart. I think this paint will do the job. Paint is an optional step that is supposed to keep oil from seeping. I doubt any oil was actually seeping out. The leak I had was all through the quill.
   
henryarnold, proud to be a member of MetalworkingFun Forum since Apr 2012.
Reply
Thanks given by:
#27
Here's the R8 end of the quill assembly. The spindle is supported by two tapered roller bearings. My quill would not come apart with tapping of a rubber mallet so I had press the spindle out of the top tapered bearing.
   
The whole quill is supported by two metal plates with a hole between them. You need to catch the spindle because it can pop out suddenly. Once the top bearing has been removed, the bottom bearing can be removed by supporting the bearing on the plates and then pressing the spindle through. Again be careful to lay a pad for the spindle to fall on or keep your hand on it so it doesn't hit the floor.
   
Here's the spindle removed from the quill.
   
This photo shows the outer part of the bearing which must be removed and replaced with the new one.
   
I used a bearing puller to remove the upper and lower bearing outer parts. My bearing puller is an inexpensive Harbor Freight unit. The fingers are not sharp enough to catch a thin lip so I sharpened the on a grinder.
   
henryarnold, proud to be a member of MetalworkingFun Forum since Apr 2012.
Reply
Thanks given by:
#28
This photo shows the R8 lower end of the quill before installation of the new bearing outer race. Make sure the bearing location is very clean. Any debris will keep the bearing from properly seating.
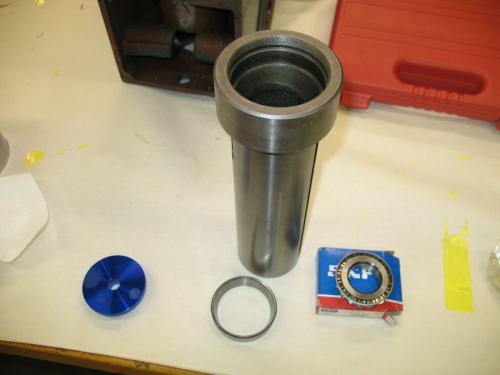
   
I was able to tap the outer races in with a rubber mallet and a bearing driver plate. I installed both upper and lower outer bearing races with a rubber mallet and bearing plate.
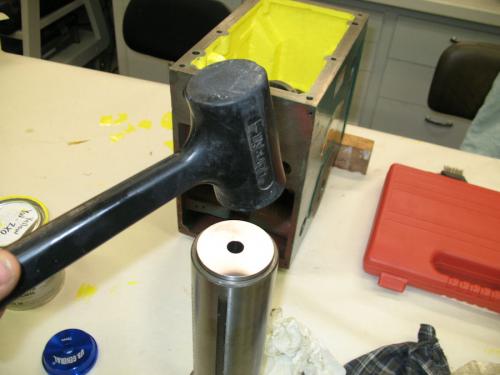
   
Upper installed.
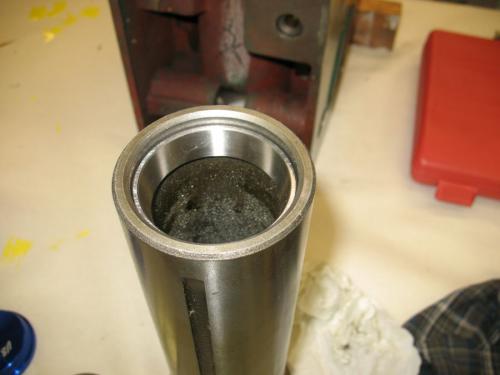
   
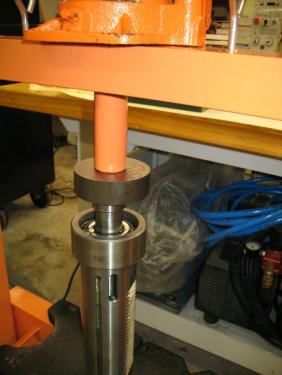
Lower inner race ready to be pressed into place.
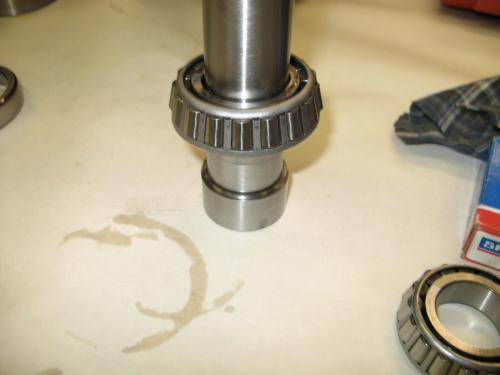
   
To install the lower inner race I slid it on to the quill and then used the shop press to push it into place.
   
henryarnold, proud to be a member of MetalworkingFun Forum since Apr 2012.
Reply
Thanks given by:
#29
Henry, just being the devils advocate but is there any chance the lub oil will dissolve the oil based paint. Glyptal is formulated to resist it.
Following along with interest.
Greg
Free advice is worth exactly what you payed for it.
Greg
Reply
Thanks given by:
#30
(05-07-2012, 01:29 AM)f350ca Wrote: Henry, just being the devils advocate but is there any chance the lub oil will dissolve the oil based paint. Glyptal is formulated to resist it.
Following along with interest.
Greg

Yes there is a chance. It is possible that Glyptal is the only good solution. I Googled this quite a bit and a few things are in my favor. Glyptal is used in engine blocks that get hot. My mill head won't get hot. I found people that successfully used Rustoleum to spray the inside of gearboxes so I know oil based paint can be successful. Last, the Chinese company that built my mill did a half hearted interior paint job which I know wasn't Glyptal and it held up fine. I mentioned Glyptal because that is the proper way to paint a gearbox. I do not suggest following what I did. You are right I may regret trying to save $35.

I'll report back later on how it goes. Hopefully I won't see bits of yellow paint floating past my sight glass. If you want to paint your head interior and be sure it's right, use the Glyptal.
henryarnold, proud to be a member of MetalworkingFun Forum since Apr 2012.
Reply
Thanks given by:


Users browsing this thread: 1 Guest(s)