Installing a DRO Digital Read Out on a Lathe
#21
(07-04-2012, 01:11 PM)EdK Wrote: Good progress Henry. Thumbsup

Ed

Thanks Ed. I'm finished with the hardest part. I wasn't looking forward to taking the carriage apart and milling it. It came out fine but a mistake here would have ruined my day.
Henry
henryarnold, proud to be a member of MetalworkingFun Forum since Apr 2012.
Reply
Thanks given by:
#22
Looking good HenryThumbsup

Thanks for sharing your DRO install. There are lots of good techniques shown in the process.

Dan
Collecting tools for 30 years.
Reply
Thanks given by:
#23
(07-02-2012, 01:29 PM)f350ca Wrote: Henry
Another option is to turn the scale sideways and mount the pickup over the ways. Guess there's a chance of getting cuttings in the seal but hasn't affected mine. On my big lathe they brought a bolt out from the saddle for the tailstock to hit before it contacted the scale.

[Image: IMGP1402.jpg]

Greg,
Thanks for the suggestion. That is a really nice lathe and your DRO install is great. I like that you are able to have a compound scale. My lathe is way too small to even attempt a compound scale.
Henry
henryarnold, proud to be a member of MetalworkingFun Forum since Apr 2012.
Reply
Thanks given by:
#24
Nice work Henry!!!!!!! Mine was much more of a slap it on job.
By the way that lathe of yours is far too clean, make my tools look pathetic. This is the cleanest the Colchester ever looked.
Free advice is worth exactly what you payed for it.
Greg
Reply
Thanks given by:
#25
Looking good so far Henry
Hunting American dentists since 2015.
Reply
Thanks given by:
#26
Henry,

Looks good Smiley-signs107
Smiley-eatdrink004
DaveH
Reply
Thanks given by:
#27
Very neat Henry
Thanks for a well documented & photographed thread Smiley-signs107Smiley-signs107
John
Reply
Thanks given by:
#28
Today I worked on the brackets to connect the Y Axis scale pickup to the carriage. The bracket mounts on the carriage area I milled yesterday and bolts to two threaded holes on the scale pickup.

I made the bracket from 2 pieces of angle aluminum. the larger one is 3/16" thick and connects to the carriage. The other piece is 1/16" and thick and cradles the pickup. These two pieces form an "S" shape that goes between the carriage and the pickup.
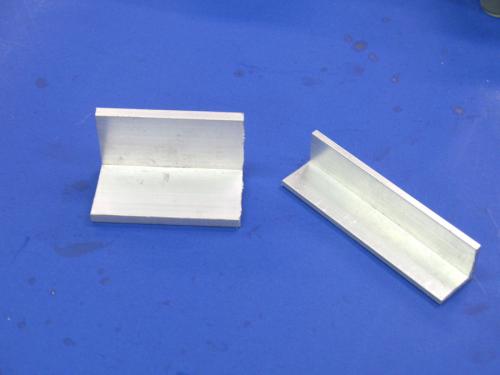
   
I slotted the pieces so that they can be adjusted once mounted on the lathe. There needs to be the ability to adjust the pickup position in relation to the scale in 2 directions. The first direction is how close the pickup is to the scale and the second direction is the vertical planarity to the scale.
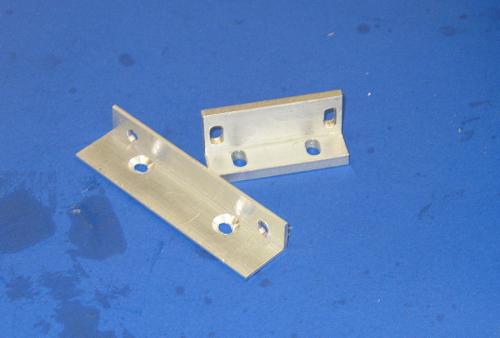
   
Once I completed the milling of slots and holes, I assembled the 2 pieces. The thinner long piece bolts to the scale and has countersunk screws that connect it to the other bracket which is slotted so that the offset can be adjusted. The other bracket bolts to the carriage through 2 more slotted holes which provide the adjustment of the pickup distance to the scale. This photo shows the completed assembly upside down so that you can see the slots that are used to bolt to the carriage and the countersunk screw area where the scale pickup rests.
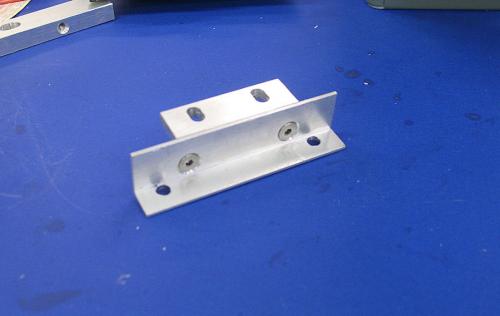
   
I installed the bracket assembly and then checked the clearance between the pickup and scale. For my scale, this distance needs to be 0.050"-0.060". The adjustment for this is where the bracket connects to the carriage. The vertical planarity of the pickup to the scale is adjusted using the flat head screws that connect the parts of the "S" shape which expands or contracts the offset from the carriage to where the bracket connects to the pickup.
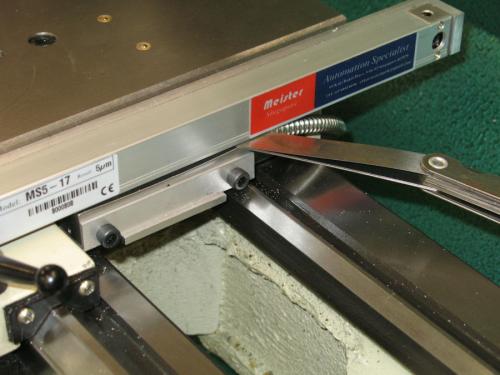
   
I also rechecked the horizontal planarity of the scale to the travel of the cross slide. I also rechecked my pickup clearance at each end of the cross slide travel.
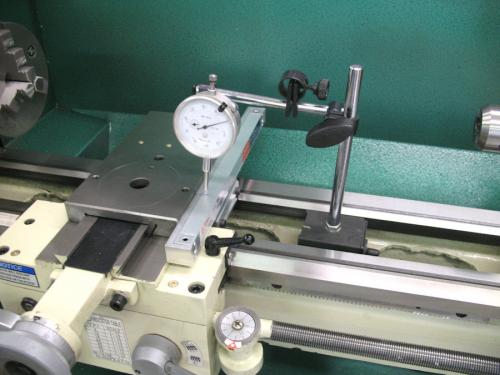
   
henryarnold, proud to be a member of MetalworkingFun Forum since Apr 2012.
Reply
Thanks given by:
#29
Here's a photo showing the bracket installed and the connection with two bolts to the carriage (lower 2 bolts). There are also two bolts that connect to threaded holes on the pickup (upper bolts).
   
I re-installed my compound and QCTP. Here's a photo showing the completed Y Axis installation.
   
I connected my display and the scale works great. I checked to make sure that I have full travel without the scale ramming into the back splash. I'm going to really enjoy having a DRO on my lathe.
   

In the next couple of days I'll finish the installation with the X Axis scale which is mounted on the rear of the lathe bed.
henryarnold, proud to be a member of MetalworkingFun Forum since Apr 2012.
Reply
Thanks given by:
#30
(07-04-2012, 07:10 PM)f350ca Wrote: Nice work Henry!!!!!!! Mine was much more of a slap it on job.
By the way that lathe of yours is far too clean, make my tools look pathetic. This is the cleanest the Colchester ever looked.

Thanks. My lathe is only a couple of years old. This is my second lathe. My first lathe was a 9x20. Someday I may be able to buy an industrial lathe like your Colchester.
henryarnold, proud to be a member of MetalworkingFun Forum since Apr 2012.
Reply
Thanks given by:


Users browsing this thread: 1 Guest(s)