Mill X-axis Powerfeed for G08689
#21
Hi Guys,

I do have some more pictures if you want to see them! I may also have some drawings of the various parts.
Reply
Thanks given by:
#22
Yes please. Drool

Ed
Reply
Thanks given by:
#23
Hi Guys,

Here are some more pictures, I will try to give an explanation as I go along !
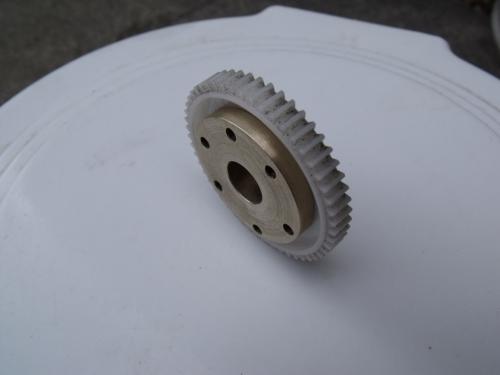
   

This is the brass bush inserted into the plastic gear. These pictures were taken before the keyway slot was put in.
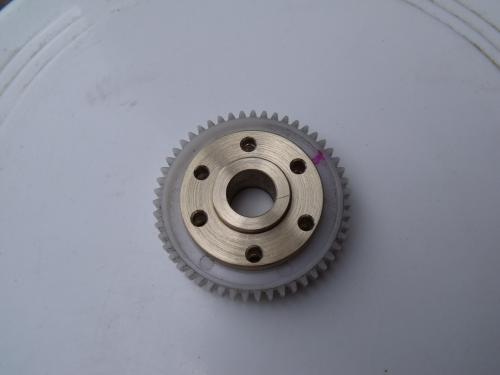
   

This is the brass bush inserted into the plastic gear. These pictures were taken before the keyway slot was put in.
The support ring is behind the plastic gear. This ring is tapped for the M3 screws used to hold the parts together.
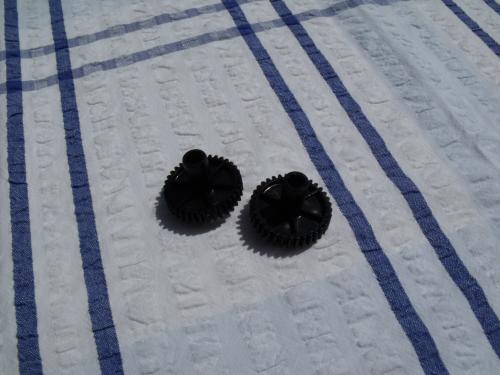
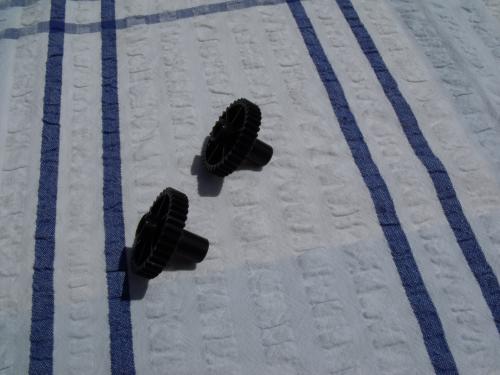


These are the small tumbler gears. They just happened to have the same teeth to fit the large gear and the one on the wiper motor shaft. These gears were all salvaged from various pieces of equipment, mainly printers and photocopiers.
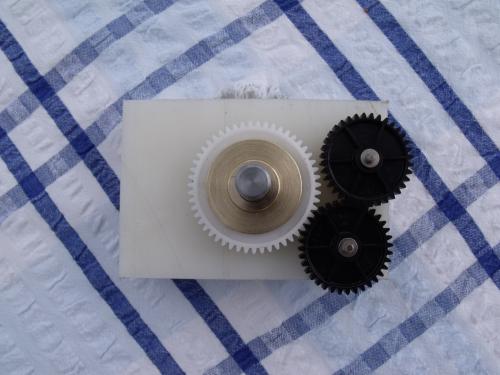
   

This is a mock up when I was deciding where to mount the two gears.
Note that they are shown on a 12 mm thick Nylon plate. It was this that I used for the tumbler mechanism.
One thing that I should mention, is that I did not remove or replace the left hand end cheek of the mill table ! But I did use the two screw holes securing the end cheek to mount the aluminum plate that supports the table drive.
That is a dummy shaft supporting the large gear.

The end cheek of the mill table has boss on it that holds the bearings for the leadscrew. The outside of that boss is very convenient for using as the support for the tumbler mechanism. The plastic plate sits on that boss very nicely, allowing full movement of the tumbler.
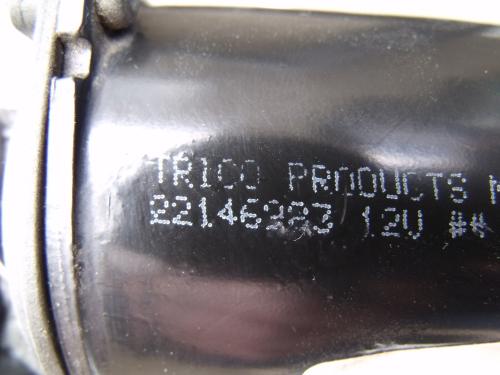
   

This is the "Trico" Window wiper motor that I used.
It is a dual speed motor, it uses the motor frame as the common positive connection. I have mine wired on the slowest speed. However it is rarely powered at more than eight or nine volts and more often at five or six. It really depend upon what I'm machining. I do put the full 30 volts on the motor for fast traverse.

In use the motor can take several amps in fast traverse but in normal use only a couple of amps.
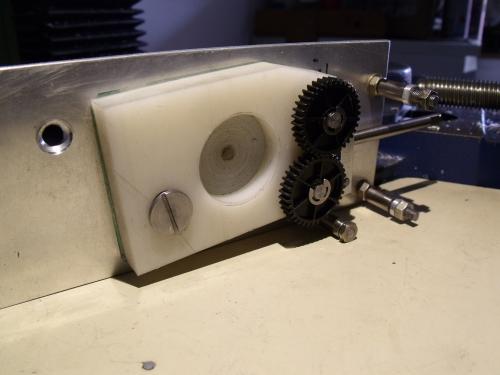
   

In this picture you can see the 3 mm aluminum plate used to secure the drive mechanism to the end of the mill table along with the mounting pillars that are used to support the wiper motor mounting plate, also 3 mm thick. You can also see one of the screw holes where I used a countersunk M6 screw into the end of the mill table.

I used a dummy shaft in order to decide where to drill and thread a large (M8) shoulder screw. This screw also prevents the tumbler lever plate from falling off and also sets the amount of movement of the tumbler.
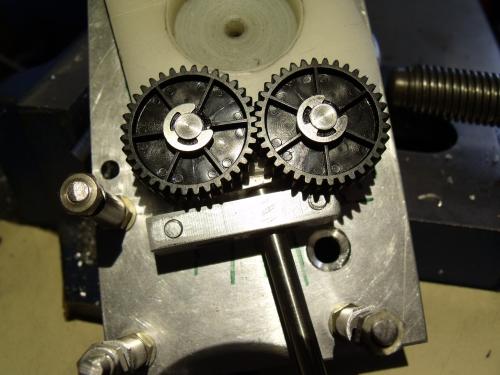
   

In this picture you get a better view of the tumbler mechanism and the dog clutch lever.

I'll post some more pictures later.
Reply
Thanks given by:
#24
Got back to working on this, and decided the next step was to wire up the motor. It turns, has loads of torque, and is FAR TOO SLOW! It runs at 70 PRM, which is about 4.375 inches per minute of table travel. That's barely enough for fly cutting, but nowhere near fast enough for rapid movement.

I've been looking at belt driven gears (spare parts for the mill from LMS), gearing and whole new motors. Nothing I've found seems to work like I want. Back to the drawing board.
Full of ideas, but slow to produce parts
Reply
Thanks given by:
#25
I found a 200 RPM gearmotor at DigiKey, but it only has about 1.5 ft-lbs of torque; I'm not sure that will be enough. The problem arises when you get those small motors that the torque falls off as the speed increases. So, getting decent speeds for a fast return means too little torque at lower speeds such as for milling.

But after searching for several days, I think I have found a solution. It is going to require some creative engineering (Rube Goldberg) to mount, but I think it should work. Pictures to follow as I get parts in hand to test.
Full of ideas, but slow to produce parts
Reply
Thanks given by:
#26
Gear it to increase the torque?
The standard power feeds that you can buy have a rapid transit speed of about 200RPMs so that's what to aim for.

I need to get back onto my power feed project also. I haven't done much in the shop for weeks.

Ed
Reply
Thanks given by:
#27
As promised, I have tried my idea and deemed it adequate for the job at hand.  My I present my oh-so-clever Tongue solution:


Yes, that is a Harbor Freight special.  12v Warrior drill driver.  Supposedly 550RPM max, but I don't believe it.  

And while I'm not being serious, it is, in part, my solution.  I will disassemble my brand new drill (which cost a whopping $14.99 on sale), and use the motor and planetary gearbox within to make my power feed.  I also bought and tried the 18v version, which is faster and more powerful, but decided I could live with the slower speed because my power supply is 12v, and I didn't want to buy another one.

As shown, the 12v version moves the mill table from one extreme to the other in about 25 seconds.  The 18v version did it in about 16 seconds.

I will now perform my motor-ectomy and figure out a way to mount that instead of the wiper motor.  All the rest of the project will be as I started, unless I run into some problems.
Full of ideas, but slow to produce parts
Reply
Thanks given by: EdK
#28
(03-23-2024, 05:02 PM)rleete Wrote: As promised, I have tried my idea and deemed it adequate for the job at hand.  My I present my oh-so-clever Tongue solution:


Yes, that is a Harbor Freight special.  12v Warrior drill driver.  Supposedly 550RPM max, but I don't believe it.  

And while I'm not being serious, it is, in part, my solution.  I will disassemble my brand new drill (which cost a whopping $14.99 on sale), and use the motor and planetary gearbox within to make my power feed.  I also bought and tried the 18v version, which is faster and more powerful, but decided I could live with the slower speed because my power supply is 12v, and I didn't want to buy another one.

As shown, the 12v version moves the mill table from one extreme to the other in about 25 seconds.  The 18v version did it in about 16 seconds.

I will now perform my motor-ectomy and figure out a way to mount that instead of the wiper motor.  All the rest of the project will be as I started, unless I run into some problems.

Not a bad idea. Thumbsup

Ed
Reply
Thanks given by:
#29
(03-23-2024, 05:02 PM)rleete Wrote: As promised, I have tried my idea and deemed it adequate for the job at hand.  My I present my oh-so-clever Tongue solution:


Yes, that is a Harbor Freight special.  12v Warrior drill driver.  Supposedly 550RPM max, but I don't believe it.  

And while I'm not being serious, it is, in part, my solution.  I will disassemble my brand new drill (which cost a whopping $14.99 on sale), and use the motor and planetary gearbox within to make my power feed.  I also bought and tried the 18v version, which is faster and more powerful, but decided I could live with the slower speed because my power supply is 12v, and I didn't want to buy another one.

As shown, the 12v version moves the mill table from one extreme to the other in about 25 seconds.  The 18v version did it in about 16 seconds.

I will now perform my motor-ectomy and figure out a way to mount that instead of the wiper motor.  All the rest of the project will be as I started, unless I run into some problems.

Good idea.I've used old cordless drills several times. have a drawer with several extras waiting on projects.
At work the production folks had to lift a 25-30# piece of equipment to install into a rack (9 per rack, 10 racks a day at least). They eventually complained of course. I suspended a uni-strut above the production line, hung a worm drive winch off it on a trolly, and drove it with a cordless drill with a remote switch. total cost was under $50. Commercial units were over $300. although why I even cared about cost to them I have no idea.
Retired old guy finally living the dream and enjoying life to the fullest!!!
Reply
Thanks given by:


Users browsing this thread: 1 Guest(s)