Posts: 2,324
Threads: 271
Joined: Jun 2014
Location: La Libertad, Philippines
(05-25-2016, 06:25 AM)PixMan Wrote: Looks like a serious challenge. From the design, it appears the V grooves are the most critical feature in that you would have to get the center distance and depths VERY close to perfect to have it register consistently.
I do have a grinding wheel setup (wheel mounted on arbor and dressed) that's a 90º shape. We could plunge one to a given depth, crank the table over by the exact distance of center to center of the V and plunge the second. That would be far faster than four setups on V blocks, and more consistent. I imagine it's best to do that final grind on a multiple of them.
That would be a similar set-up to how I made Charpie test coupons out of chain, but there was only one V groove. In contrast the specs on the V groove included a radius on the bottom with a +/- tolerance of .001". We used a very fine grain wheel with a strong bond but I cannot remember their specs. For our purpose it created the radius on the wheel as we ground the coupon. In other words we used wheel breakdown to shape the wheel.
Personally I'd mill the V grooves with a form cutter, HT, then finish grind with a form wheel. I don't think the grooves need to be "exactly" the same from holder to holder, but CL to CL and depth need to be very close between the grooves of an individual holder. I'd grind them with semi-finish passes followed by a redressing and a single finish pass
BTW, that's probably the best QC tool holder system every designed. Used correctly it will repeat closer than any other type.
Posts: 2,596
Threads: 99
Joined: Dec 2014
Location: Michigan
Too bad you weren't coming to Michigan before going to see Ken. I could make you a plastic model of the toolpost from the holder so you guys could match the holders up.
Posts: 3,002
Threads: 51
Joined: Apr 2012
Location: Ontario
The following 1 user Likes f350ca's post:
Roadracer_Al (06-07-2016)
Come up to Canada for a visit and we'll cut some long strips on the shaper. Would be a great excuse to put a DRO on it.
Free advice is worth exactly what you payed for it.
Greg
Posts: 4,683
Threads: 93
Joined: Feb 2012
Location: Perth, Australia
Thanks Guys!
I visited Tom in the leafy green suburbs of Detroit a few years back when I had a meeting in Ann Arbor and I hope to get back there someday. It is a pity you weren't on this forum then Vinny, we could have all caught up for a beer!
Canada is on my list of places to visit Greg, so when I do I will certainly be dropping in if I can. I'd really like to see your work first hand.
As I often fly with Emirates into the East coast of the US (my meeting this year is in Bethesda, MD) Boston is one of the hubs that I can use. Surprisingly, Ken always seems to have leave at the exact same time I am in the US, so I do what I can to keep him off the streets whilst I am there  Plus, I owe Russell a few beers (probably dinner and a movie as well) after he gifted me a box of goodies the last time I was there.
Perhaps we should all congregate in central MA for a few days in September...
Hunting American dentists since 2015.
Posts: 691
Threads: 14
Joined: Feb 2015
Location: Oakland, California
The following 1 user Likes Roadracer_Al's post:
Mayhem (06-07-2016)
I used to live 5 miles from Bethesda.
See whom you can get nekkid pics of in order to shift your meetings to the West Coast!
Posts: 537
Threads: 15
Joined: Jun 2012
Location: Cambridge, England
08-04-2016, 01:45 AM
(This post was last modified: 08-04-2016, 01:47 AM by Rickabilly.
Edit Reason: grammar/spelling corrections
)
Having made more than a couple of these Dixon holders now, I can assure y'all the important dimensions in order are;
1, Vee groove centres
2, depth of the Tee slot clamping face
3, finally the centralisation of the main square groove that forms the tee slot as there is a key block on some toolposts.
Grinding all the faces would be ideal but a nice milled finish is just as good for 99% of uses, given that keeping everything clean in use if far more important for accuracy in use,
Regards
Rick
Whatever it is, do it today, Tomorrow may not be an option and regret outlasts fatigue.
Posts: 4,683
Threads: 93
Joined: Feb 2012
Location: Perth, Australia
The following 1 user Likes Mayhem's post:
EdK (08-27-2016)
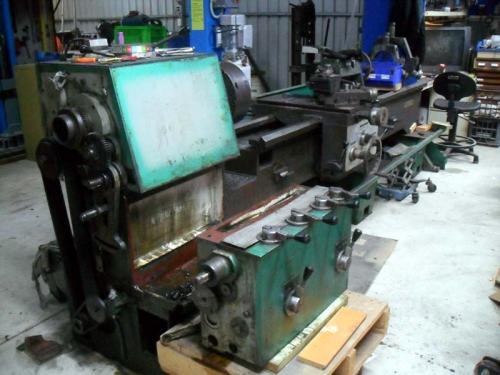
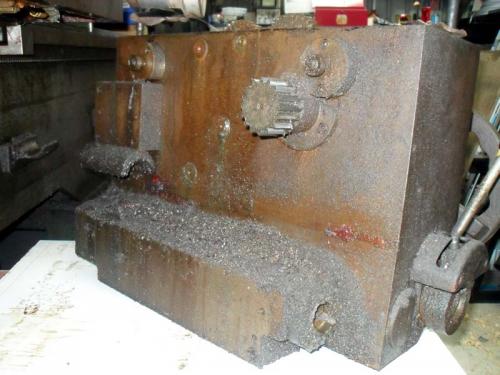
I got some time to pull the gearbox off of my lathe to see if there was anything obvious to explain why I couldn't get some of the levers to select their full range. When I first looked at the lathe, the issue was getting the feed control on the apron to work. However, once it was delivered, I also had issues with the selectors on the gearbox and though that perhaps something had shifted in transit. I was expecting to find a broken selector arm or something else jammed up in there.
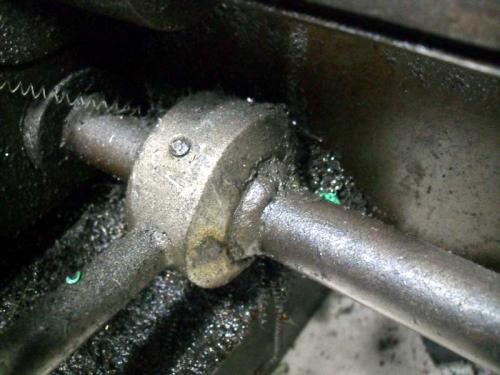
There are only five bolts that hold the gearbox on. Four are in the back, accessible from behind the electrical panel and the other is one of the headstock bolts. These were all easy compared to the four shafts. Most of the work was getting pins driven out to achieve separation. The worse of them all was the spindle start/stop shaft, which I discovered someone had welded the handle hub to the shaft  Fortunately, the whole shaft was able to be driven out from the change gear end of the gearbox, as it only passes through and doesn't interact with anything. Handling the shafts was fun, given their length!
Some pics:
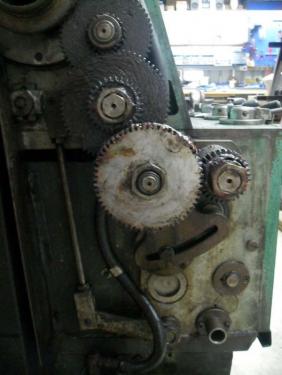
Banjo, some of the change gears and the arm (bottom left) had to come off. The change gears were slathered in red bearing grease. You can just see the recess where the headstock bolt lives that attaches to the gearbox.
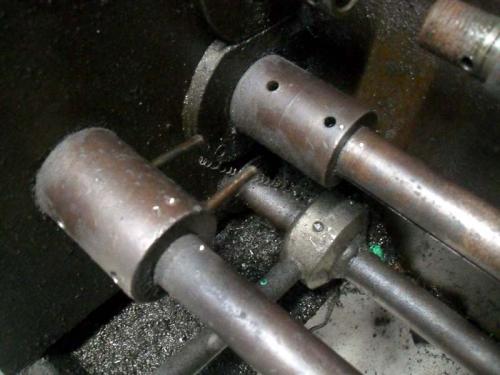
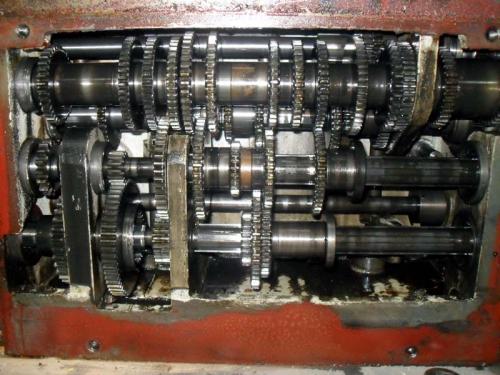
The four shafts (left to right): Dog clutch (threading control), Spindle control, Feed shaft, Lead screw (already retracted):
Closeup of the aftermarket repair:
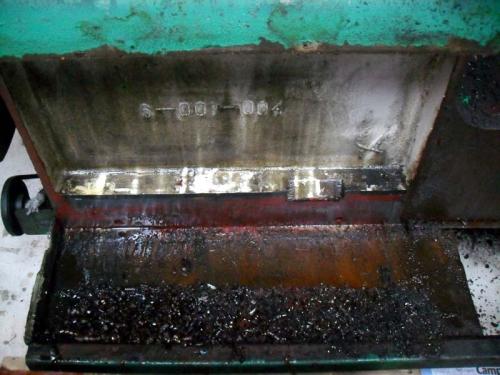
Guess where the serial number is located? Of course, I'd always think to look behind the gearbox! I still have no idea how all that swarf got there:
The business side of things. I should get a better picture but it was late and I was knackered!
This is where I left off last night. Hopefully today I'll get the apron off, as that is now the most likely source of my problems:
Hunting American dentists since 2015.
Posts: 4,683
Threads: 93
Joined: Feb 2012
Location: Perth, Australia
Got the apron off and it is full of grease and crap. Nothing appears to be obviously broken but it is going to need a lot of cleaning to see what is going on in there. I'm going to make up a bracket so that I can fit it to my engine stand and then pressure wash the crap out of it.
Why do people insist on forcing grease through the oil nipples 
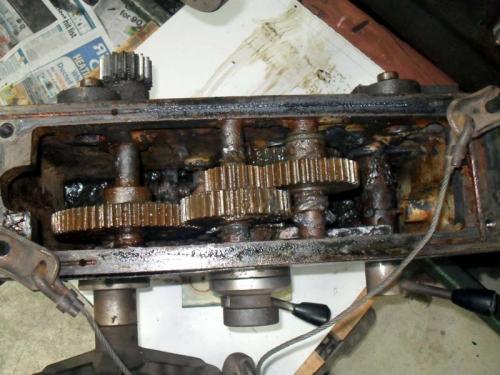
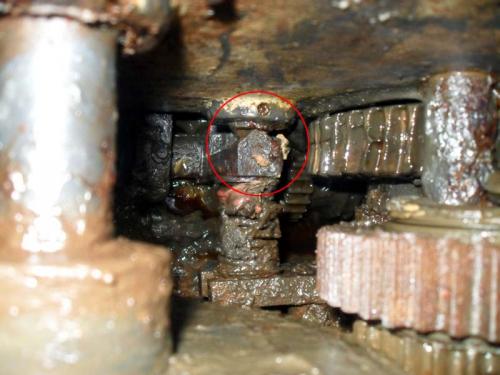
The red circle indicates what appears to be the latching mechanism to hold the feed selector in place. There is a spring hiding under that grease, as well as a longer one that runs the length of the apron. I may have to post the drawings once I have this cleaned up, as I may need some help figuring it all out:
Red bearing grease and crap everywhere!
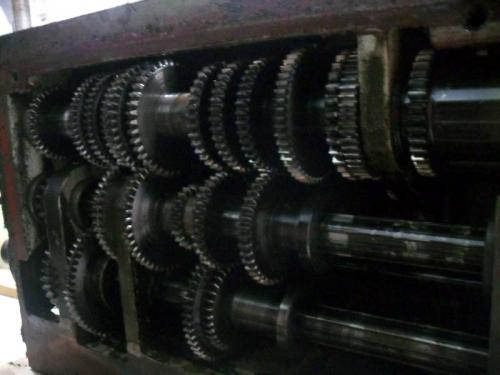
A better look at the gear box. I am so happy that all seems to be OK in there, as that would be a big box of fun to dismantle and put back together again!
Hunting American dentists since 2015.
Posts: 4,683
Threads: 93
Joined: Feb 2012
Location: Perth, Australia
I made some progress over the weekend in cleaning up the apron but I haven't had time to get the pictures off of my camera, so I'll do that tomorrow (hopefully).
Yesterday, before I finished up in the shop, I decided to check off all the threading and feed settings on the gearbox. So, I grabbed the input shaft and turned it, and nothing happened. So I look inside and I can see the shaft and a single tooth that is parallel to the shaft but it is too far away from what I can see to be the mating component. So I check the drawing and can see that it is a clutch. I then spent the best part of 30 minutes trying to figure out how it works.
Finally the penny dropped and I realised that this is the single tooth dog clutch that is used when threading. When reading the manual, it gave the impression that this only applies to threading, so it never occurred to me that it actually controls the input into the gearbox (i.e. it sets the direction of the feed). I'm pretty sure that I had this in neutral when I checked the lathe out when I got it here, which is why I suddenly lost all drive and assumed that something had come loose in transit. I'm glad that I pulled the gearbox off, as it is much easier to see how it all works, as the drawings are split into three, each showing certain shafts. Much easier to them all together.
Hunting American dentists since 2015.
Posts: 2,344
Threads: 53
Joined: Feb 2012
Location: Spencer MA USA
What a mess. At least you know the machine was (at one time) good enough to merit being used...a lot.
You're so much more ambitious than me. The task you took on will take up lots of your time but the payoff will be a fully operational machine and you'll know how to run it without trashing it. If I didn't have so many other distractions I'd pull the apron off my lathe and get the automatic way lube system working right. I've got a problem now where the 70T factory original spur gear that drives the feed box has worn rapidly and I need a new one.
We'll talk things over when you're here but let's just say you're going to be posting back to your home a couple of big heavy boxes.
|


 Plus, I owe Russell a few beers (probably dinner and a movie as well) after he gifted me a box of goodies the last time I was there.
 Fortunately, the whole shaft was able to be driven out from the change gear end of the gearbox, as it only passes through and doesn't interact with anything. Handling the shafts was fun, given their length!